By Bajdi on April 18, 2012
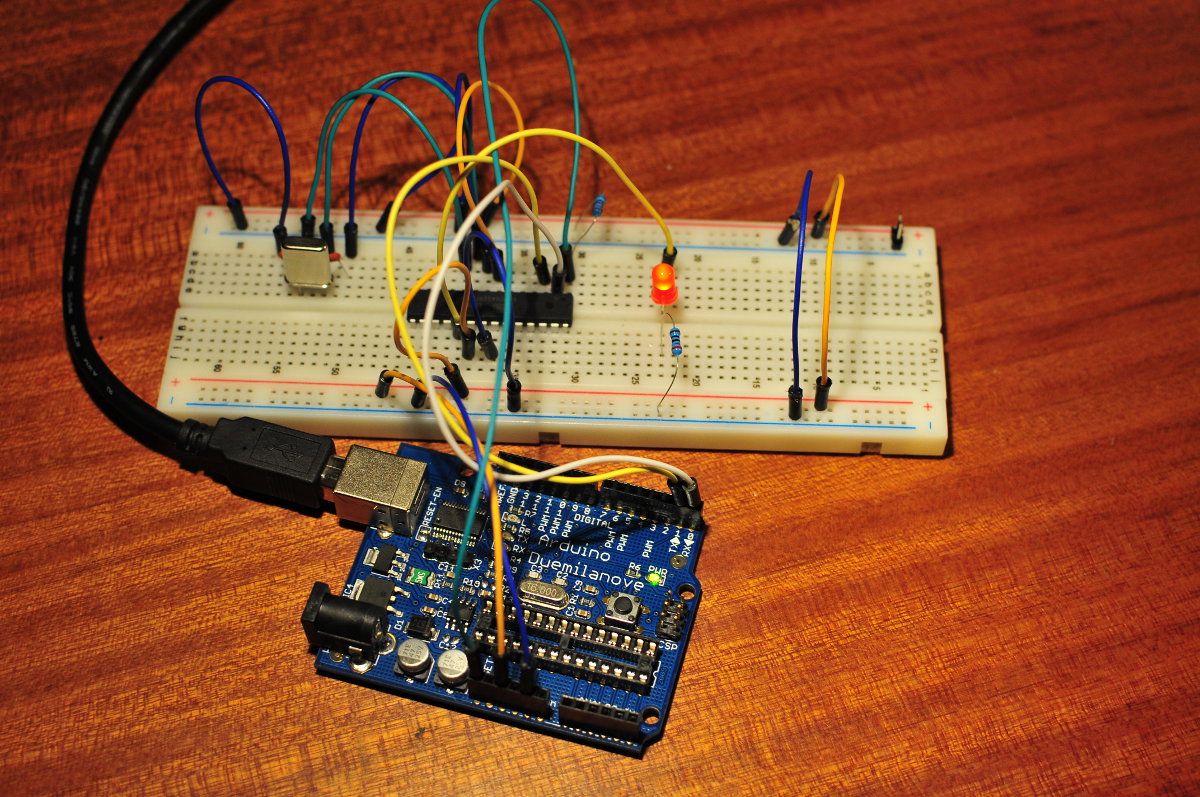
Arduino burning bootloader to ATmega 328P-PU
I already bought a single ATmega 328P-PU microcontroller, I got it from the official Arduino store and it came with the bootloader already on it. I didn’t have much trouble putting sketches on the chip when I put it on a breadboard. While searching for information on how to accomplish this I read that putting a bootloader on a bare ATmega is actually very easy.
I needed some more electronic parts and while browsing the website of Tayda Electronics I saw that they also sell bare ATmega 328P-PU’s. This is the exact same micro controller that is used in the Arduino Duemilanove and Uno. They only cost 3,5$ a piece so I couldn’t resist and bought a couple. They came all the way from Thailand and arrived here pretty fast. So today I decided it was time to put the bootloader on them. It’s so easy that I can’t say much about it. I just followed the instruction on the Arduino website.
I used an Arduino Duemilanove as an ISP (in system programmer). If you only have an Uno it’s a little bit harder, you’ll need to add a 10 uF capacitor between reset and ground. So don’t be put of by buying bare ATmega 328P-PU microcontrollers, putting the bootloader on them is really easy 🙂 I quickly tested them by connecting a led to pin 13 and loading the blink without delay sketch on them, and they worked…
Posted in Arduino | Tagged ATmega328P-PU |
By Bajdi on April 15, 2012
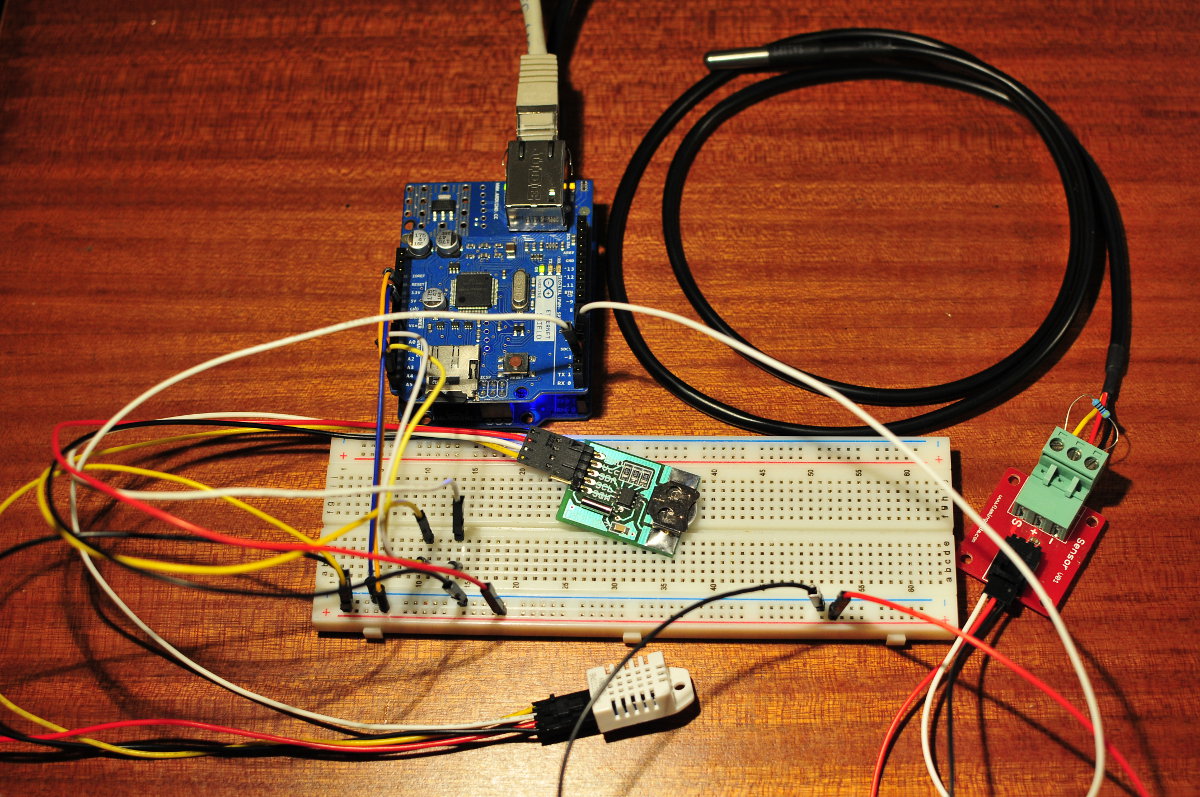
Arduino data logging with webserver and RTC
Made a really big sketch today 🙂 I used an Arduino Uno, ethernet shield with sd slot, DS1307 RTC and 2 temperature sensors for this sketch. I used 2 different temperature sensors, one is a DHT22 sensor which can also sense the humidity and the other is a DS18B20 sensor. To get all this to work I needed no less then 8 libraries, the ethernet and sd library take up a lot of space which makes this sketch so big. After compiling the sketch the size is 23634 bytes (of a 32256 byte maximum). It was pretty easy to code, I started from the various examples that come with the Arduino IDE and put them together. I would never have gotten this to work if I had to start from scratch.
The temperature sensors are polled once every 5 seconds, there is not much point in polling them more often to get room temperatures. I did not use the delay or millis function for this but the time from the DS1307. The date, time, and temperature values are written to a CSV file on the SD card every 5 seconds. A CSV file is easily imported in a spreadsheet. All the data is also made available on a webserver. If you need ethernet and a sd slot for a project the latest official ethernet shield is very handy as it has both. I bought mine from the official Arduino shop. You can find similar shields on ebay from Chinese sellers. But there seem to be quite a lot of topics on the Arduino forum of people having trouble with them.
There is one thing this sketch needs to make it better and that’s an automatic update from a timeserver to sync the time with the DS1307 RTC. The DS1307 is not the most accurate chip, even after a day the time will be of by a couple of seconds.
/*
 http://www.bajdi.com
 SD card datalogger and webserver with DS1307 RTC.

 This sketch shows how to log data from a DHT22 and DS18B20 sensor to an SD card using the SD library.
 The data from the sensors is updated every 5 seconds and written to the SD card in a CSV file.
 Time stamp is taken from a DS1307 RTC. The data of the DHT22, DS18B20 and RTC is also available on a webserver.
 */

#include <SPI.h>
#include <Ethernet.h>
#include <Wire.h>
#include "RTClib.h"
#include <dht.h>
#include <SD.h>
#include <OneWire.h>
#include <DallasTemperature.h>

const int ONE_WIRE_BUS = 3;                // signal pin of DS18B20 connected to pin 3
OneWire ourWire(ONE_WIRE_BUS);
DallasTemperature sensors(&ourWire);

dht DHT;

RTC_DS1307 RTC;

#define DHTTYPE DHT22 // Sensor type
#define DHT22_PIN 2   // DHT22 signal on pin 2

byte mac[] = {
  0xDE, 0xAD, 0xBE, 0xEF, 0xFE, 0xED };
byte ip[] = {
  192,168,1, 10 };

int lastTime = -1;

float temp;            // float for temperature value from DS18B20

Server server(80);

const int chipSelect = 4;      // CS for SD card

void setup()
{
  Serial.begin(9600);
  Ethernet.begin(mac, ip);
  server.begin();
  Wire.begin();
  sensors.begin();            // for DS18B20 sensor
  RTC.begin();
  RTC.adjust(DateTime(__DATE__, __TIME__));
  Serial.print("Initializing SD card...");
  pinMode(10, OUTPUT);

  // see if the card is present and can be initialized:
  if (!SD.begin(chipSelect)) {
    Serial.println("Card failed, or not present");
    // don't do anything more:
    return;
  }
  Serial.println("card initialized.");
}

void loop()
{
  DateTime now = RTC.now();                              // get time from RTC

  int time = now.second();
  if (abs(time - lastTime) > 5)
  {
    int chk = DHT.read22(DHT22_PIN);                       // get data from DHT22
    sensors.requestTemperatures();                         // get data from DS18B20
    temp = sensors.getTempCByIndex(0);


    File dataFile = SD.open("datalog.CSV", FILE_WRITE);

    // if the file is available, write to it:
    if (dataFile) {
      dataFile.print(now.day(), DEC);
      dataFile.print('/');
      dataFile.print(now.month(), DEC);
      dataFile.print('/');
      dataFile.print(now.year(), DEC);
      dataFile.print(" , ");
      dataFile.print(now.hour(), DEC);
      dataFile.print(':');
      dataFile.print(now.minute(), DEC);
      dataFile.print(" , ");
      dataFile.print((float)DHT.temperature);
      dataFile.print(" , ");
      dataFile.println((float)temp);
      dataFile.close();
      // print to the serial port too:
      Serial.print("DHT = ");
      Serial.println(DHT.temperature);
      Serial.print("DS18B20 = ");
      Serial.println(temp);
    }
    // if the file isn't open, pop up an error:
    else {
      Serial.println("error opening datalog.CSV");
    }
    lastTime = time;
  }

  Client client = server.available();
  if (client) {
    // an http request ends with a blank line
    boolean currentLineIsBlank = true;
    while (client.connected()) {
      if (client.available()) {
        char c = client.read();
        if (c == '\n' && currentLineIsBlank) {
          // send a standard http response header
          client.println("HTTP/1.1 200 OK");
          client.println("Content-Type: text/html");
          client.println();

          client.print(now.day(), DEC);
          client.print('/');
          client.print(now.month(), DEC);
          client.print('/');
          client.print(now.year(), DEC);
          client.print(' ');
          client.print(now.hour(), DEC);
          client.print(':');
          client.print(now.minute(), DEC);
          client.println("<br />");
          client.print("Arduino powered webserver");
          client.println("<br />");
          client.print("Serving temperature and humidity values from a DHT22 and DS18B20 sensor");
          client.println("<br />");
          client.print("Inside temperature (oC): ");
          client.print(DHT.temperature);
          client.println("<br />");
          client.print("Humidity (%): ");
          client.print(DHT.humidity);
          client.println("<br />");
          client.print("Outside temperature (oC): ");
          client.print(temp);
          client.println("<br />");

          break;
        }
        if (c == '\n') {
          // you're starting a new line
          currentLineIsBlank = true;
        }
        else if (c != '\r') {
          // you've gotten a character on the current line
          currentLineIsBlank = false;
        }
      }
    }
    // give the web browser time to receive the data
    delay(1);
    // close the connection:
    client.stop();
  }
}
Posted in Arduino sketches | Tagged DS1307, webserver |
By Bajdi on April 14, 2012
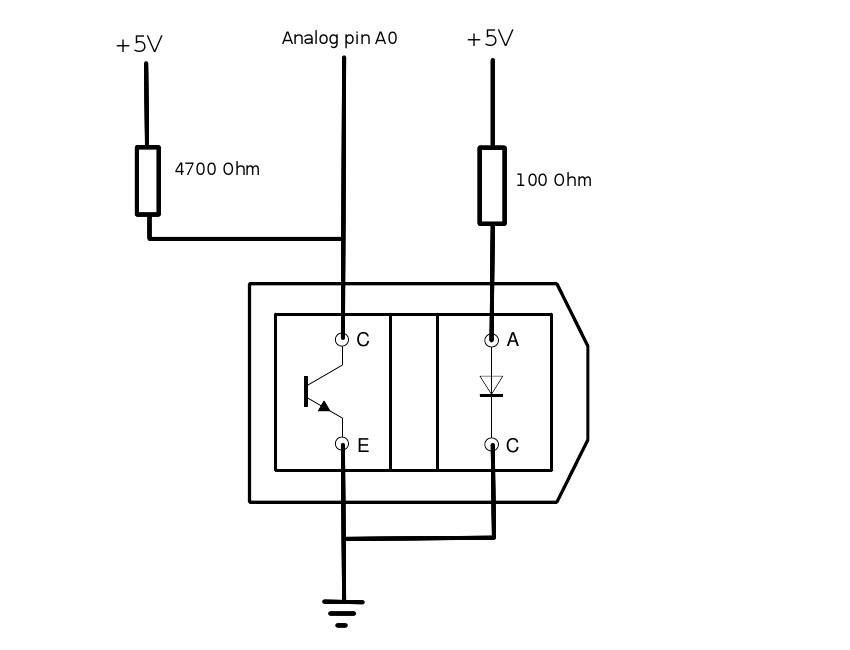
TCRT5000 connection diagram
Played with a TCRT5000 sensor today. When I last tried these cheap little sensors I found out that they are very sensitive to ambient light. I always test my electronics on a breadboard, about a meter above it hangs a 40W halogen lamp. I got very different results when I turned of the lamp. So I decided to have a closer look into this and try do an analogread on the sensor. That way I have a better idea on how the sensor behaves. I hooked up the TCRT5000 sensor like in the drawing above. You only need 2 resistors, a 100 Ohm and a 4K7 Ohm.
I wrote a sketch see what’s going. In this sketch I divide the analogread from the sensor and use that to pwm a led. When the sensor detects nothing the led lights up. When there is an object very close to the sensor the led dims. I can also read the analog reading of the serial monitor. This sensor is ideal to use for a line following robot. I originally thought about using it as an object detection sensor. But it is not suitable for this. It only detects object that are really close to the sensor.
Here is the sketch:
/* http://www.bajdi.com
   Analog reading of TCRT5000 sensor connected to Arduino Uno
   TCRT5000 pins: (see datasheet http://www.vishay.com/docs/83760/tcrt5000.pdf )
     C = Arduino analog pin A0 and to one end of 4K7 resistor, other end of resistor to 5V
     E = GND
     A = 100 ohm resistor, other end of resistor to 5V
     C = GND
*/

const int led =  11;      // the number of the LED pin
int tcrt;

void setup() {
  Serial.begin(9600);
  pinMode(led, OUTPUT);
}

void loop(){
  tcrt = analogRead(A0);
  Serial.println(tcrt);
  analogWrite(led, tcrt/4);
}
Posted in Arduino sketches | Tagged TCRT5000 |