By Bajdi on April 28, 2013
Bajdupod 996R: Arduino hexapod from Bajdi on Vimeo.
I finally finished the design of my hexapod chassis and had it laser cut this week. I had 3 plates laser cut in acrylic. The original chassis was a bit to small to fit everything. So I designed a bigger chassis and went for 3 decks. This gives me enough room for the battery and electronics. Between the bottom and the middle plate are the Lipo battery, UBEC’s and power servo power PCB. Between the middle and the top plate are the Seeeduino Mega and my Bajduino Mega 3A with the ATmega1284 micro controller.
I could run all the code on one micro controller but it’s more fun to use 2. The 2 micro controllers communicate with each other over hardware serial. The Bajduino Mega 3A has a header for the nRF24L01 module and at the moment it only handles the wireless communication.
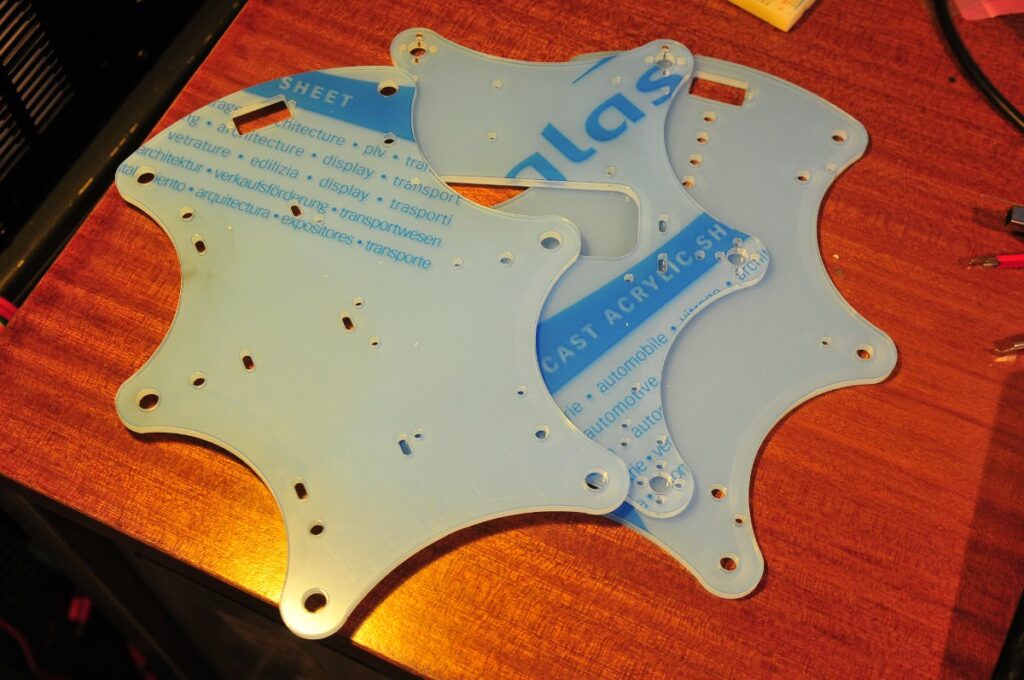
Hexapod Bajdupod 996r chassis
While I took the hexapod apart to fit the new chassis I replaced all the servo horns with metal ones. I also fitted bearings in the bottom plate of the chassis, these hold the legs. As you can see in the video the servos need to be better calibrated so all 6 legs are the same. Sounds simple but it’s not that easy to get it right.
I have not fitted the top plate yet, that’s for later. I’ll also be adding some leds and sensors.
BTW If you’re wondering what the strange music is in the video, the ice cream van just drove by while I shot the video in the garden 🙂
Posted in Bajdupod 996R | Tagged hexapod |
By Bajdi on April 20, 2013
I’ve bought me a HC05 bluetooth module on Ebay. And I also recently got me a Samsung smartphone. When you trow an Arduino robot in the mix you get the above video 🙂
The HC05 bluetooth modules seem to be very popular. You can easily find them on Ebay. I bought the module on a small PCB that has a 3.3V voltage regulator. As the HC05 module works at 3.3V. Communicating with the module is very easy. It’s just plain simple serial, so you don’t need any special libraries.
I connected the TX/RX signals of the HC05 bluetooth module to an ATmega1284 through a voltage divider. I used a 10K and a 5K6 resistor to drop the voltage from 5V to 3.2V. I just soldered the resistors and some pins to a piece of perfboard. I used an ATmega1284 as it has 2 serial ports, one for uploading sketches and the serial monitor and the other for the bluetooth module. You can of course connect it to an Arduino with an ATmega328 using the software serial library. It doesn’t make much difference in the code.
So after connecting the HC05 module to my Bajduino I needed to try it out. I just got myself a new Android smartphone so I started browsing the Android play store for a suitable app. Then I remembered that Rocket Brand Studios sells a small app to control a robot, Rocketbot robot controller. It isn’t a free app but it costs less then 2€. And I have to say it is a great app for a small price.
After successfully trying out the example sketch from Rocket Brand studios I wrote a simple sketch to control a robot with 2 continuous rotation servos. Here is the sketch:
// Bluetooth controlled Arduino robot
// http://www.bajdi.com
// HC05 bluetooth module receicing 2 bytes from Android app
// Android app = Rocket Bot Controller (rocketbrandstudios.com)
// 2 continuous rotation servos
// µController = ATmega1284P-PU


#include <Servo.h>

Servo leftServo;  // create servo object to control a servo
Servo rightServo;  // create servo object to control a servo
int qualifier;
int dataByte;

void setup()

{
  Serial.begin(57600);   // serial monitor
  Serial1.begin(9600);   // HC05 bluetooth module
  leftServo.attach(21);
  leftServo.write(90);   // stop servo
  rightServo.attach(22);
  rightServo.write(90);  // stop servo
}

void loop()
{
  if(Serial1.available()>1)
  {
    qualifier=Serial1.read();
    dataByte=Serial1.read();

    Serial.print("qualifier = ");
    Serial.println(qualifier);
    Serial.print("dataByte = ");
    Serial.println(dataByte);

    if ( qualifier == 68)
    {
      if (dataByte == 1)
      {
        forward();
      }
      if (dataByte == 2)
      {
        left();
      }
      if (dataByte == 3)
      {
        right();
      }
      if (dataByte == 4)
      {
        backward();
      }
      if (dataByte == 5)
      {
        stop();
      }
    }
  }
}

void stop(){
  leftServo.write(90);               // stop
  rightServo.write(90);              // stop
}

void forward(){
  leftServo.write(0);              // go straight forward
  rightServo.write(120);
}

void backward(){
  leftServo.write(180);                // backward
  rightServo.write(60);
}

void left(){
  leftServo.write(140);                // go left
  rightServo.write(100);
}

void right(){
  leftServo.write(40);              // go right
  rightServo.write(80);
}
Posted in Arduino sketches | Tagged HC05, robot |
By Bajdi on April 14, 2013
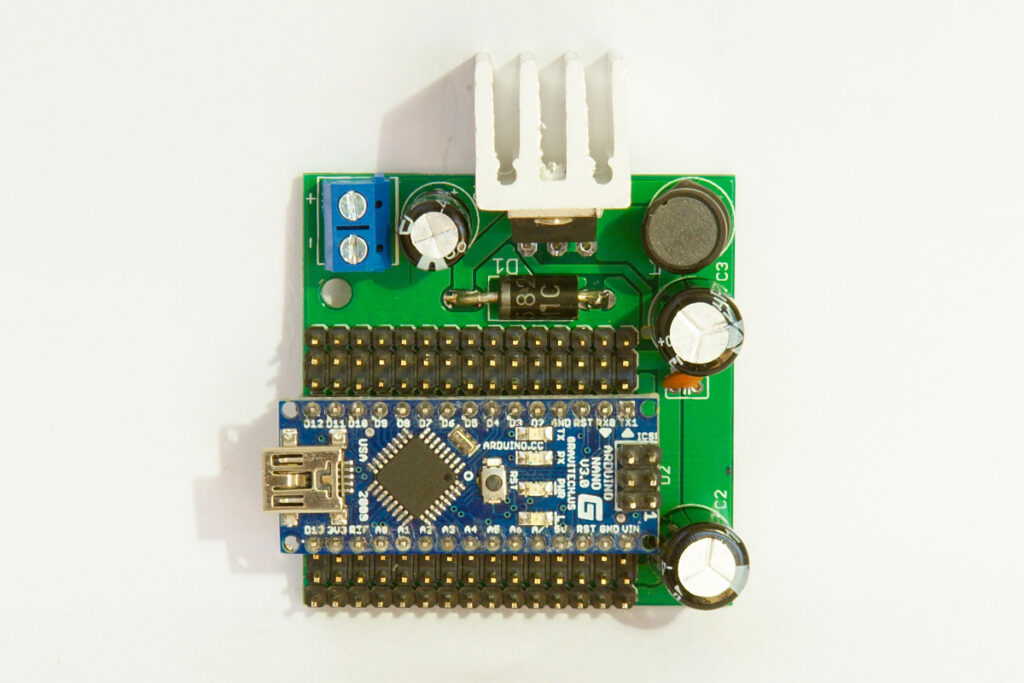
Arduino nano undershield
Almost a year ago I designed my first PCB. It was a small 50x50mm PCB that acts as an undershield for an Arduino Nano. I designed it because the Arduino Nano has a tiny 5V voltage regulator. To not overheat the regulator you can not draw more then 200-300mA from it depending on the input voltage. Since I use Lipo batteries for most of my projects I also needed a regulator to power a couple of small servos. So I thought why not design a shield with a cheap 3A 5V switch mode regulator (LM2576). 3A is more then enough for a couple of servos and some sensors. The added benefit is that the switch mode regulator is much more efficient then a linear regulator. Which is a good thing when you use battery power.
While my first design worked it had a couple of small mistakes. Some of the holes were not big enough and some of the traces were a bit on the thin side. So I decided to make an improved version. In this version the Nano gets its power through the Vin pin. It is connected to the screw terminal through a schottky diode. Next to the Nano there are 3 rows of pins. The row with pins closest to the Nano are connected to the pins on the Nano. The middle row is the 5V, which comes from the 3A regulator. The outer row of pins are the ground pins. These 3 rows of pins make it very easy to connect servos and sensors to the Arduino Nano without have to worry if they get power enough. I’ve done some testing with the board and even connected 10 little servos to it. The regulator could handle the servos but the 5V line becomes very noisy. It does not effect the Nano though since it doesn’t get power from the regulator. With a small heatsink like the one in the photo below the regulator is good for about 2A without overheating.
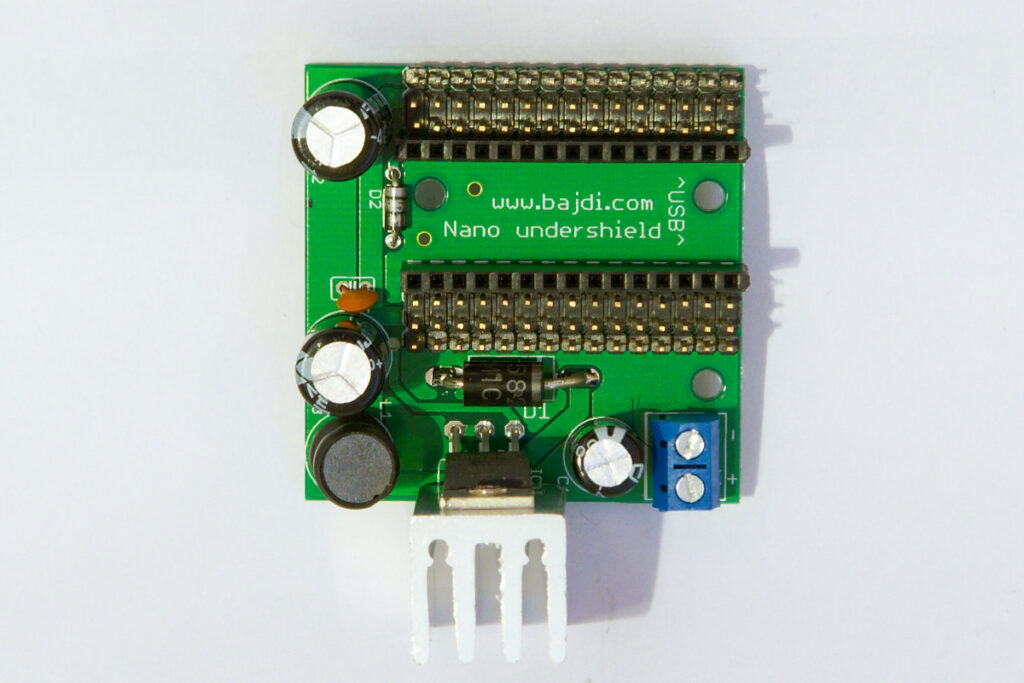
Arduino nano undershield
Parts used:
1x PCB made by Seeedstudio
1x Screw terminal with 2 positions 5mm (Tayda Electronics)
1x Capacitor 100µF 50V (Tayda Electronics)
1x LM2576 5V (Tayda Electronics)
1x TO220 heatsink (Tayda Electronics)
1x 100µH 3A inductor (Ebay)
2x Capacitor 1000µF 25V (Ebay)
1x 1N5822 3A diode (Tayda Electronics)
1x 100nF 50V Ceramic capacitor (Tayda Electronics)
1x 1N5818 Schottky diode (Tayda Electronics)
A couple of strips of male and female headers (Tayda Electronics)
I had 10 of these PCB’s made by Seeedstudio, I wont be needing them all. If you would like to have one sent me an email: info|@|bajdi d|0|t com
Posted in Arduino | Tagged Bajduino, Nano |