Bajdi electronics

Hobby electronics website

Browse: Page 11

L9110 H-bridge module

By Bajdi on May 31, 2013

L9110 H-bridge

L9110 H-bridge

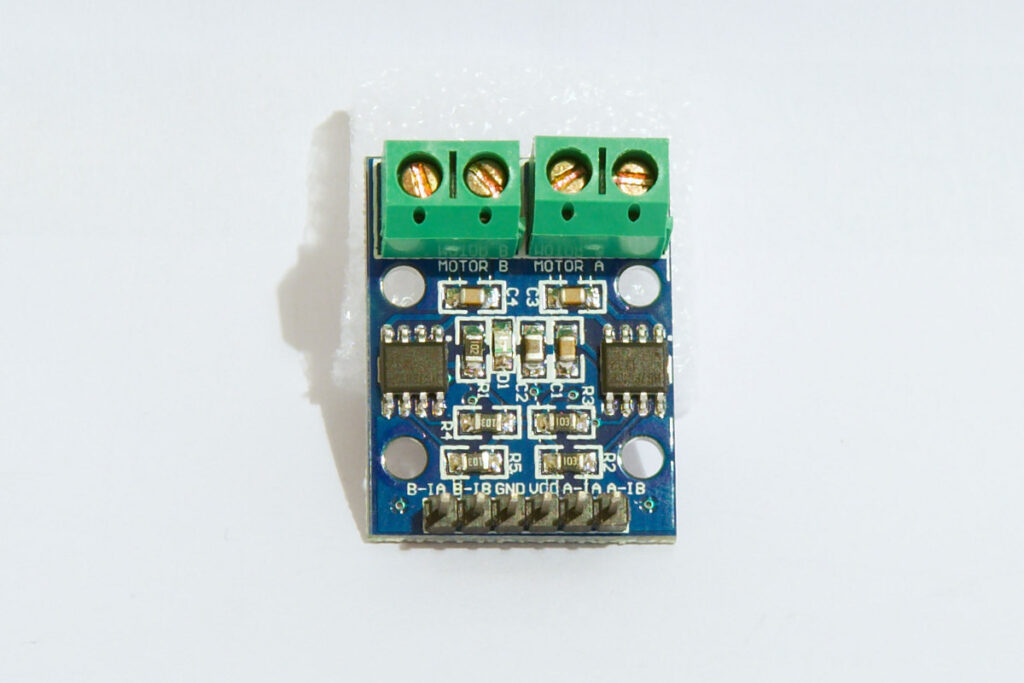
I bought another small motor driver, this time a module with 2 L91110 H-bridge chips. These dual L9110 H-bridge modules can be found for 3-4$ on Ebay or from Chinese webshops. The module has 2 L9110 IC’s, so it can control 2 DC motors or 1 stepper motor. You can download the datasheet of the chip here. The L9110 works with voltages from 2.5 to 12V and can give a continues current of 800mA. With a maximum peak current of 1.5-2A. More then enough for a small DC motor.

The board has 6 male pins and 2 double terminals. The motors connect to the 2 terminals. In the middle of the male pins are the VCC and GND pins. This is the input voltage for the L9110 chips. Some H-bridges like the L293 and L298 require a logic voltage and a separate voltage for the motors, the L9110 does not. You only have to supply it one voltage (between 2.5 and 12V). The other 4 pins control the direction and speed of the motors. Pin A-IA and A-IB control motor A, and Pin B-IA and B-IB control motor B. To control motor A you set pin A-IA high and pin A-IB low, to change the direction you just set pin A-IA low and pin A-IB high. Same thing for motor B. If you want to control the speed of both motors you will need 4 pwm pins. Instead of just setting a pin high you pwm it. I tested the board with 2 small dc motors and fed the chip 5V, the output voltage at full pwm was 4.5V. Here is the sketch to test the module with 2 small DC motors:

/*
 http://www.bajdi.com
 L9110 motor driver controlling 2 small DC motors 
 */

const int AIA = 9;  // (pwm) pin 9 connected to pin A-IA 
const int AIB = 5;  // (pwm) pin 5 connected to pin A-IB 
const int BIA = 10; // (pwm) pin 10 connected to pin B-IA  
const int BIB = 6;  // (pwm) pin 6 connected to pin B-IB 

byte speed = 255;  // change this (0-255) to control the speed of the motors 

void setup() {
  pinMode(AIA, OUTPUT); // set pins to output
  pinMode(AIB, OUTPUT);
  pinMode(BIA, OUTPUT);
  pinMode(BIB, OUTPUT);
}

void loop() {
  forward(); 
  delay(1000);
  backward();
  delay(1000);
  left();
  delay(1000);
  right();
  delay(1000);
}

void backward()
{
  analogWrite(AIA, 0);
  analogWrite(AIB, speed);
  analogWrite(BIA, 0);
  analogWrite(BIB, speed);
}

void forward()
{
  analogWrite(AIA, speed);
  analogWrite(AIB, 0);
  analogWrite(BIA, speed);
  analogWrite(BIB, 0);
}

void left()
{
  analogWrite(AIA, speed);
  analogWrite(AIB, 0);
  analogWrite(BIA, 0);
  analogWrite(BIB, speed);
}

void right()
{
  analogWrite(AIA, 0);
  analogWrite(AIB, speed);
  analogWrite(BIA, speed);
  analogWrite(BIB, 0);
}
Posted in Arduino sketches, Buying parts | Tagged L9110 | 26 Responses

Arduino pwm frequency

By Bajdi on May 30, 2013

Arduino pwm frequency

Arduino pwm frequency

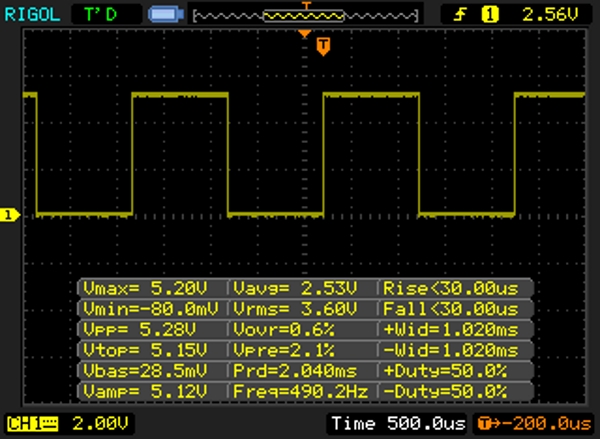
While playing with a couple of H-bridges one motor had more torque then the other. Although the voltage going to both motors was the same. The reason was that I was using 2 pins with different pwm frequencies. I had read that not all the pwm pins had the same frequency but couldn’t find a list on the Arduino website with the different frequencies of the pwm pins. So I used my oscilloscope to check the frequencies of the different pwm pins. While I was at it I checked all my different Arduinos. Here is the list:

Arduino with ATmega328 (Duemilanove/Uno/Nano)
pin 3 490Hz
pin 5 980Hz
pin 6 980Hz
pin 9 490Hz
pin 10 490Hz
pin 11 490Hz

ATmega1284 (Maniacbug bootloader)
pin 3 980Hz
pin 4 980Hz
pin 6 490Hz
pin 7 490Hz
pin 12 490Hz
pin 13 490Hz
pin 14 490Hz
pin 15 490Hz

Arduino Mega (ATmega1280 and ATmega2560)
pin 2 490Hz
pin 3 490Hz
pin 4 980Hz
pin 5 490Hz
pin 6 490Hz
pin 7 490Hz
pin 8 490Hz
pin 9 490Hz
pin 10 490Hz
pin 11 490Hz
pin 12 490Hz
pin 13 980Hz
pin 44 490Hz
pin 45 490Hz
pin 46 490Hz

Arduino Leonardo (ATmega32U4)
pin 3 980Hz
pin 5 490Hz
pin 6 490Hz
pin 9 490Hz
pin 10 490Hz
pin 11 980Hz
pin 13 490Hz

BTW, it is possible to change the frequency of the pwm pins. But this will change the behaviour of the Arduino core libraries. The Millis and delay function will not work as they should. Many libraries will stop working, for example the servo library. More info on the Arduino website: http://playground.arduino.cc/Code/PwmFrequency

Posted in Arduino | Tagged pwm | 3 Responses

Added some leds to my hexapod

By Bajdi on May 18, 2013

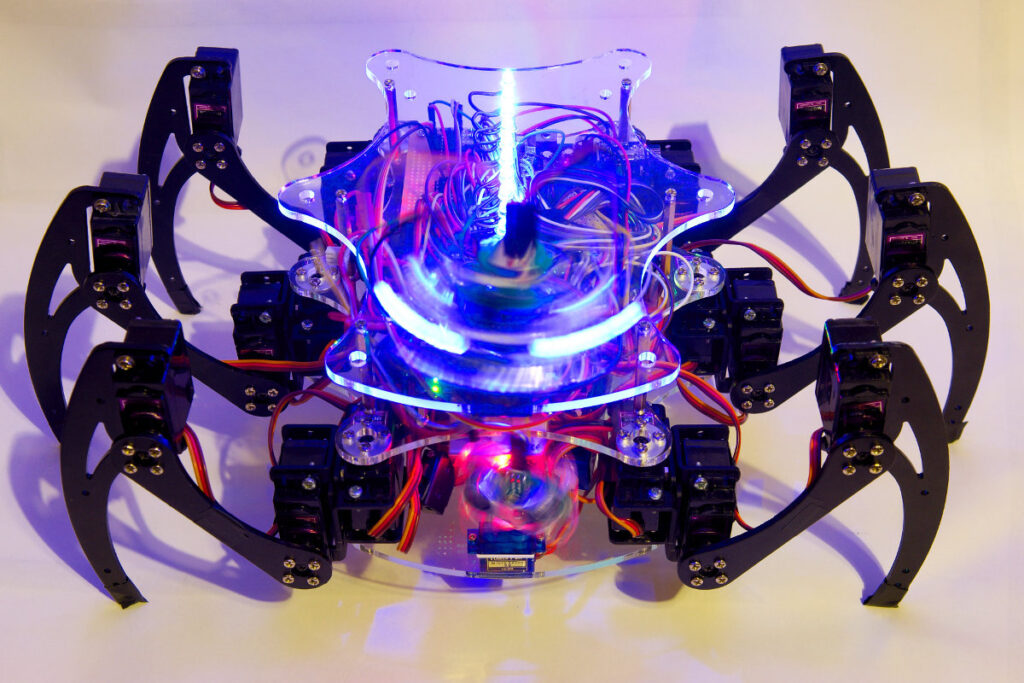
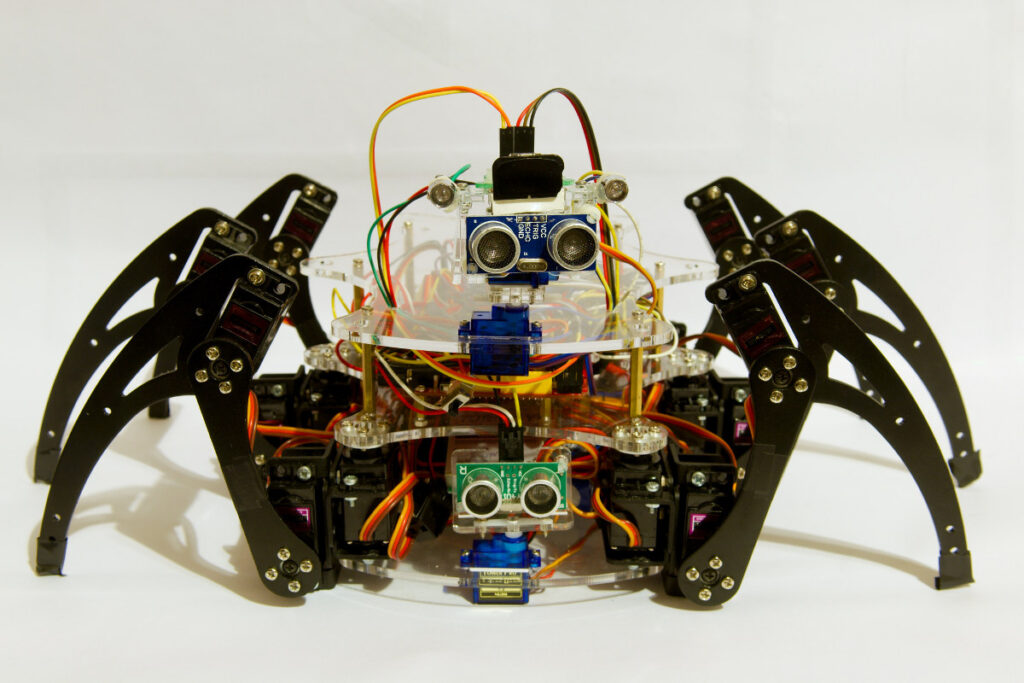
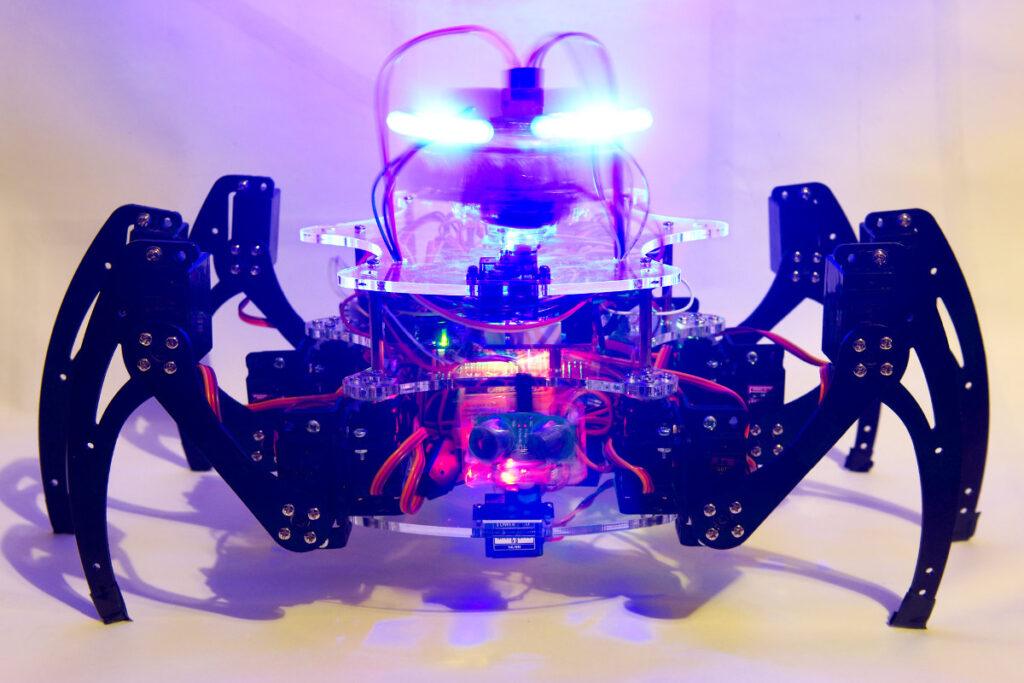
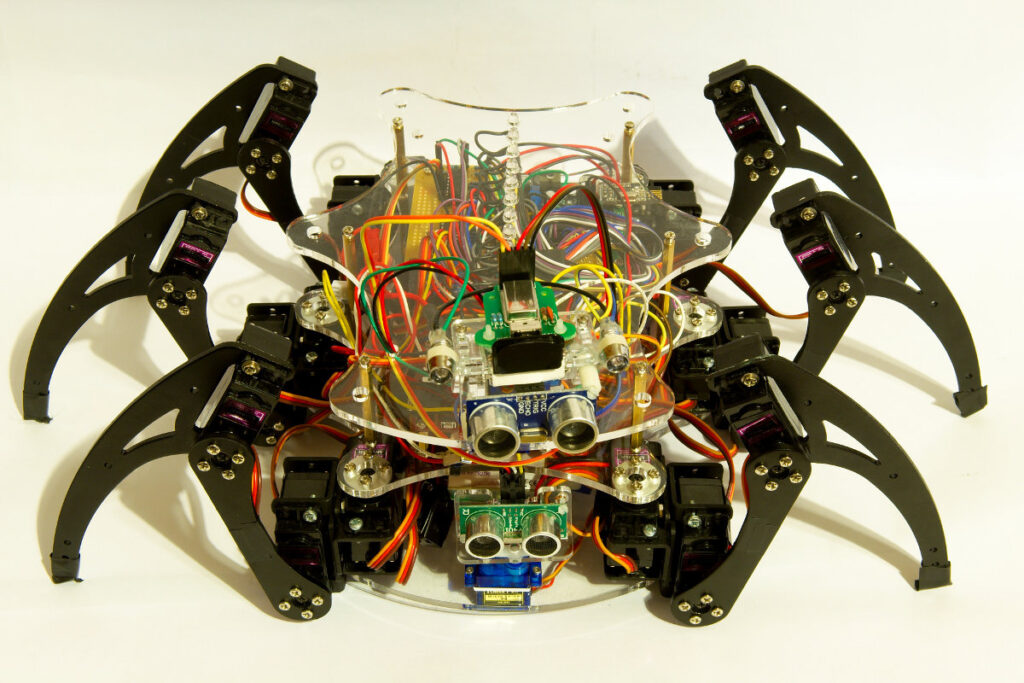
I’ve added the top chassis plate to my hexapod. I glued 16 blue leds to it and then soldered wires to the leds. The wires are connected to 2 74HC595 shift registers. My hexapod needed some sensors so I mounted 3 small servos to it. One in the bottom plate that sweeps a SRF06 ultrasonic sensor. On the top plate I mounted a pan/tilt kit with a SR04 ultrasonic sensor and a Rocket brand studios Wiicamera. I glued another 2 blue leds to the pan tilt kit. These are controlled by 2 PWM pins. All the sensors and leds are controlled by the Seeeduino Mega, so a 16MHz 8 bit micro controller is more then fast enough to control a total of 21 servos and some sensors.
I now need to learn my hexapod some tricks based on the sensor input 🙂

Some photos:

Bajdupod 996r hexapod

Bajdupod 996r hexapod

Bajdupod 996r hexapod

Bajdupod 996r hexapod

Bajdupod 996r hexapod

Bajdupod 996r hexapod

Bajdupod 996r hexapod

Bajdupod 996r hexapod

Posted in Bajdupod 996R | Tagged hexapod, LED | 2 Responses

« PreviousNext »

Recent Posts

  • 3D Printer extruders
  • Mearm forked
  • Arduino time lapse – camera pan device
  • Bought a 199$* Prusa I3 3D printer
  • Simple DIY lab power supply
  • Bajduino
    • Bajduino 1284
    • Bajduino 328
  • Stepper robot arm

Recent Comments

  1. 200+ Arduino Projects List For Final Year Students - He Loves Math on Obstacle avoiding robot made from cheap parts
  2. MP3 Alarm Clock: Crafting Customized wake-Up tunes with Arduino on Arduino MP3 alarm clock
  3. Bas on L9110 H-bridge module
  4. Victor on L9110 H-bridge module
  5. WAQAR AHMED on Dimming led with IR remote control

Archives

  • June 2016
  • August 2015
  • May 2015
  • January 2015
  • December 2014
  • November 2014
  • May 2014
  • April 2014
  • March 2014
  • February 2014
  • January 2014
  • December 2013
  • November 2013
  • October 2013
  • September 2013
  • June 2013
  • May 2013
  • April 2013
  • March 2013
  • February 2013
  • January 2013
  • December 2012
  • November 2012
  • October 2012
  • September 2012
  • August 2012
  • July 2012
  • June 2012
  • May 2012
  • April 2012
  • March 2012
  • February 2012
  • January 2012
  • December 2011

Categories

  • 3D printing
  • Arduino
  • Arduino sketches
  • Bajdupod 996R
  • Bajdupod 9G
  • Bob the biped
  • Buying parts
  • Dagu Rover 5
  • Dagu service droid
  • Gentoo
  • Insectbot
  • Line following robot
  • Raspberry Pi
  • Self balancing bot
  • Bajduino
    • Bajduino 1284
    • Bajduino 328
  • Stepper robot arm

Copyright © 2026 Bajdi electronics.

Powered by WordPress and Hybrid by Bajdi.