Bajdi electronics

Hobby electronics website

Browse: Page 9

Bob the biped

By Bajdi on September 22, 2013

Bob the biped

Bob the biped

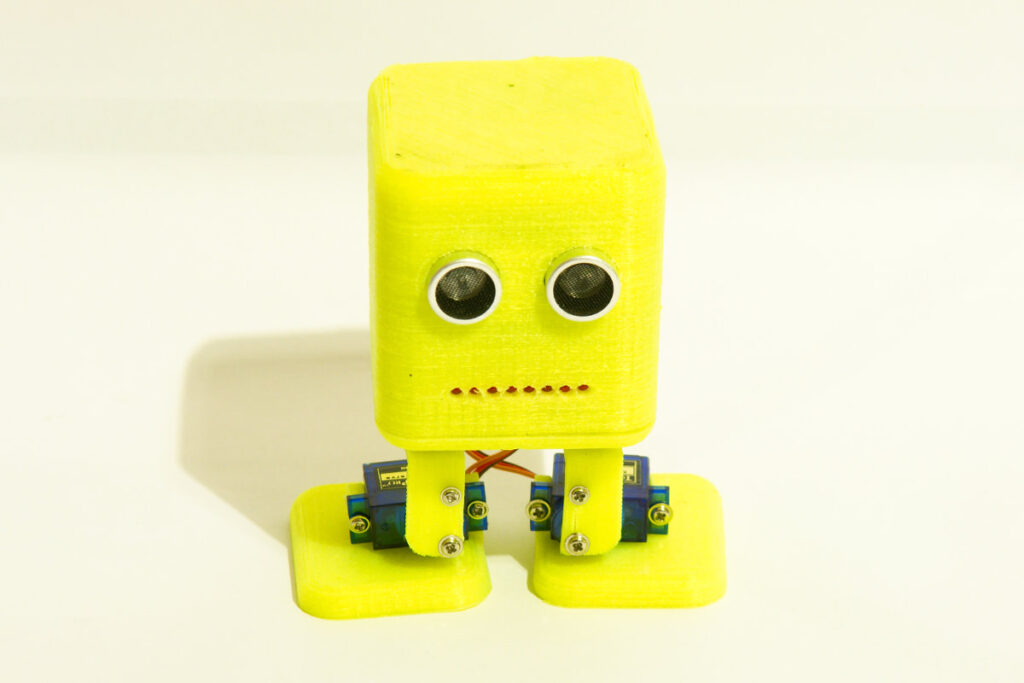
So I’ve started a new robot project 🙂 A while ago a cute little biped robot was posted on Letsmakerobots.com. And so Bob the biped was born. The cool thing about Bob is that everyone can 3D print his own. The files needed to print Bob can be found on Thingiverse. To built your own Bob you just need the 3D parts, 4 little servos and your favorite micro controller. Lots of people started building their own so I was getting a bit jealous. I wanted my own Bob! Someone very friendly on LMR offered to print me one. An offer I could not refuse. So my Bob was printed in the US, but built in Belgium. He’s very easy to put together, I just needed to clean up the 3D printed parts. I had to do a little bit of filing to make my servos and SR04 sensor fit. To fit a small power switch I drilled a 6mm hole in the back.

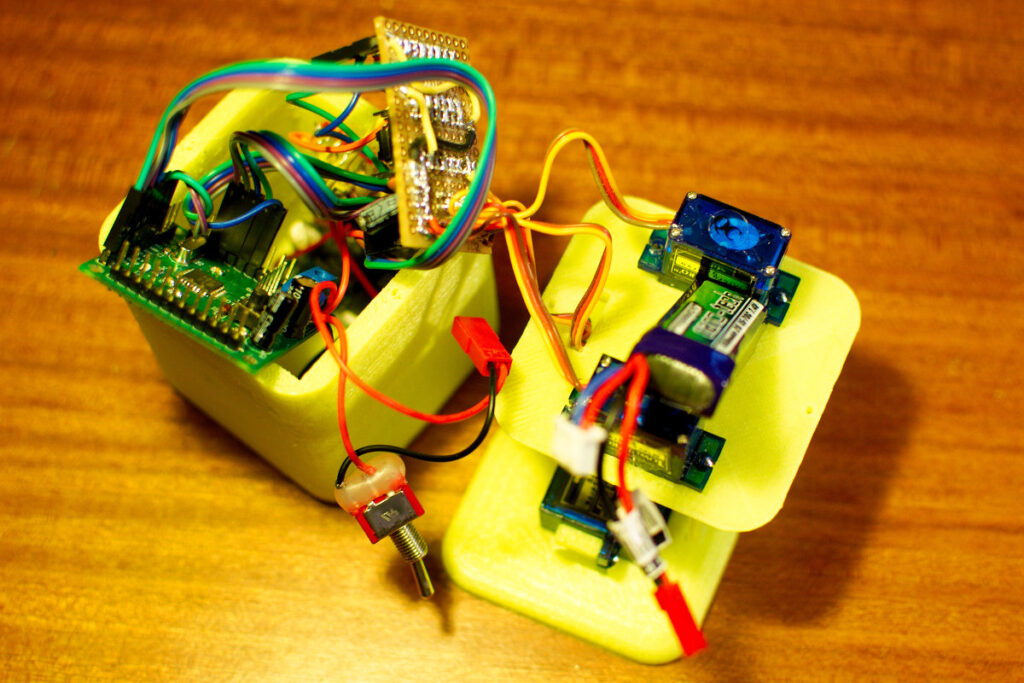
Bob is pretty small so you can’t fit a standard Arduino inside it’s head. An Arduino Nano or Micro fits though. I chose to design my own PCB, based on the ATmega328 in a TQFP package. I named it the Mini Bajduino. To power the servos and micro controller I chose to use a small 300mAh 2S Lipo battery. To drop the voltage to 5V for the servos I use a LM2596 board, you can find these very cheaply on Ebay. I used a small piece of perfboard to distribute the power of the LM2596 to the servos. I also put a 74HC595 shift register and 8 220ohm resistors on the PCB. The shift register controls the 8 leds in Bobs mouth. Bobs eyes are a SR04 ultrasonic sensor. I wasn’t easy to fit all the parts inside Bobs head. I had to cut the servo cables and use short wires to connect the leds. After a bit of fiddling I managed to fit all the parts.
Bob the biped

Bob the biped

I have quite a bit of experience controlling servos with Arduino. Still it took me many hours to find a good walking gait for Bob. I wanted to make Bob walk smoothly. So I used the same basic “timer code” I used for my hexapod. At the moment I have coded the basic walking gaits so Bob can walk forward/backward/left/right. I think he walks pretty smoothly? The servo positions can use some fine tuning. But that’s for later. I also need to program a obstacle avoiding function so Bob can walk around autonomously.

Bob in action:

Here is the code for the basic walking gait:

// http://www.bajdi.com
// Bob the biped
// Basic walking gait code

#include <Servo.h>
// 4 servos
Servo leftFootServo;
Servo leftHipServo;
Servo rightFootServo;
Servo rightHipServo;

const int offset = 20; //how many degrees we want to move the servos

// Servo positions
// Left foot servo
const int leftFootC = 85;  // centered
const int leftFootD = leftFootC-offset; // foot down
const int leftFootU = leftFootC+offset; // foot up

// Left hip servo
const int leftHipC = 85; // centered
const int leftHipL = leftHipC+offset; // hip left
const int leftHipR = leftHipC-offset; // hip right

// Right foot servo
const int rightFootC = 90;
const int rightFootD = rightFootC-offset;
const int rightFootU = rightFootC+offset;

// Right hip servo
const int rightHipC = 100;
const int rightHipL = rightHipC-offset;
const int rightHipR = rightHipC+offset;

// Servo positions we want the servo to move to (in small steps)
float leftFootPos;
float leftHipPos;
float rightFootPos;
float rightHipPos;

// Servo postions written to the servos
float leftFootPosInt = leftFootC;
float leftHipPosInt = leftHipC;
float rightFootPosInt = rightFootC;
float rightHipPosInt = rightHipC;

// Calculated values for moving servos in small steps (position we want to move to - current servo position / steps)
float leftFootStep;
float leftHipStep;
float rightFootStep;
float rightHipStep;

const int steps = 20;  // divide every servo move in 20 steps
byte speed = 40;  // time between steps
unsigned long SuperTurboTimer;
byte SuperTurboStep = 1;
unsigned long SuperTurboMillis;
unsigned long timer;
byte direction;
byte legInStep = 1;

void setup()
{
  leftFootServo.write(leftFootC);
  leftFootServo.attach(4);
  leftHipServo.write(leftHipC);
  leftHipServo.attach(5);
  rightFootServo.write(rightFootC);
  rightFootServo.attach(7);
  rightHipServo.write(rightHipC);
  rightHipServo.attach(6);
  delay(3000);
}

void loop()
{
  //direction = 0; //stopped
  direction = 1; // forward
  // direction = 2; // backward
  // direction = 3; // left
  // direction = 4; // right
  walk();
}

// This function makes Bob walk
void walk()
{
  SuperTurboMillis = millis();

  if (SuperTurboMillis >= timer){
    timer = timer+speed;

    legInStep = legInStep + 1;
    if (legInStep == steps + 1){
      legInStep = 1;
    }
    if (legInStep == 1)
    {
      leftFootStep = (leftFootPos - leftFootPosInt) / steps;
      leftHipStep = (leftHipPos - leftHipPosInt) / steps;
      rightFootStep = (rightFootPos - rightFootPosInt) / steps;
      rightHipStep = (rightHipPos - rightHipPosInt) / steps;
    }

    leftFootPosInt = leftFootPosInt + leftFootStep;
    leftHipPosInt = leftHipPosInt + leftHipStep;
    rightFootPosInt = rightFootPosInt + rightFootStep;
    rightHipPosInt = rightHipPosInt + rightHipStep;
  }

  if (SuperTurboMillis >= SuperTurboTimer){
    SuperTurboTimer = SuperTurboTimer+(steps*speed);
    SuperTurboStep = SuperTurboStep +1;
    if (SuperTurboStep == 7){
      SuperTurboStep = 1;
    }
  }

  if (direction == 0)  // stop, both feet on the ground
  {
    leftFootPos = leftFootC;
    leftHipPos = leftHipC;
    rightFootPos = rightFootC;
    rightHipPos = rightHipC;
  }

  if (direction == 1)     // forward walking gait
  {
    if (SuperTurboStep == 1)
    {
      leftFootPos = leftFootU;
      rightFootPos = rightFootD;
    }
    if (SuperTurboStep == 2)
    {
      leftHipPos = leftHipL;
      rightHipPos = rightHipR;
    }
    if (SuperTurboStep == 3)
    {
      leftFootPos = leftFootC;
      rightFootPos = rightFootC;
    }
    if (SuperTurboStep == 4)
    {
      leftFootPos = leftFootD;
      rightFootPos = rightFootU;
    }

    if (SuperTurboStep == 5)
    {
      leftHipPos = leftHipR;
      rightHipPos = rightHipL;
    }
    if (SuperTurboStep == 6)
    {
      leftFootPos = leftFootC;
      rightFootPos = rightFootC;
    }
  }

  if (direction == 2)     // backward walking gait
  {
    if (SuperTurboStep == 1)
    {
      leftFootPos = leftFootU;
      rightFootPos = rightFootD;
    }

    if (SuperTurboStep == 2)
    {
      leftHipPos = leftHipR;
      rightHipPos = rightHipL;
    }

    if (SuperTurboStep == 3)
    {
      leftFootPos = leftFootC;
      rightFootPos = rightFootC;
    }

    if (SuperTurboStep == 4)
    {
      leftFootPos = leftFootD;
      rightFootPos = rightFootU;
    }

    if (SuperTurboStep == 5)
    {
      leftHipPos = leftHipL;
      rightHipPos = rightHipR;
    }

    if (SuperTurboStep == 6)
    {
      leftFootPos = leftFootC;
      rightFootPos = rightFootC;

    }
  }

  if (direction == 3)     // left walking gait
  {
    if (SuperTurboStep == 1)
    {
      leftFootPos = leftFootU;
      rightFootPos = rightFootD;
    }
    if (SuperTurboStep == 2)
    {
      leftHipPos = leftHipL;
      rightHipPos = rightHipL;
    }
    if (SuperTurboStep == 3)
    {
      leftFootPos = leftFootC;
      rightFootPos = rightFootC;
    }
    if (SuperTurboStep == 4)
    {
      leftFootPos = leftFootD;
      rightFootPos = rightFootU;
    }

    if (SuperTurboStep == 5)
    {
      leftHipPos = leftHipR;
      rightHipPos = rightHipR;
    }
    if (SuperTurboStep == 6)
    {
      leftFootPos = leftFootC;
      rightFootPos = rightFootC;
    }
  }

  if (direction == 4)     // right walking gait
  {
    if (SuperTurboStep == 1)
    {
      leftFootPos = leftFootU;
      rightFootPos = rightFootD;
    }
    if (SuperTurboStep == 2)
    {
      leftHipPos = leftHipR;
      rightHipPos = rightHipR;
    }
    if (SuperTurboStep == 3)
    {
      leftFootPos = leftFootC;
      rightFootPos = rightFootC;
    }
    if (SuperTurboStep == 4)
    {
      leftFootPos = leftFootD;
      rightFootPos = rightFootU;
    }

    if (SuperTurboStep == 5)
    {
      leftHipPos = leftHipL;
      rightHipPos = rightHipL;
    }
    if (SuperTurboStep == 6)
    {
      leftFootPos = leftFootC;
      rightFootPos = rightFootC;
    }

  }
  leftFootServo.write(leftFootPosInt);
  leftHipServo.write(leftHipPosInt);
  rightFootServo.write(rightFootPosInt);
  rightHipServo.write(rightHipPosInt);
}

Bob now has his own website: http://www.bobrobot.com/
Posted in Bob the biped | Tagged robot, servo | 8 Responses

Joystick controlled pan tilt kit

By Bajdi on September 8, 2013

Haven’t posted here in a while 🙂 But I’ve been very busy. And bought lots of new “electronic toys”. One of the things I bought is a small plastic pan tilt kit. I got it on Ebay. It didn’t come with the servos. But I still had some small Micro 9G servos that fit the kit. To try it out I hooked up the little servos to one of my Bajduinos. I then wrote a sketch to control the pan/tilt kit with a simple analog joystick. The kit is ideal to mount a small webcam on it. Well that was my original plan. But I recently bought the official Raspberry Pi camera board. The camera fits perfectly on the kit 🙂 My goal is to control the pan/tilt kit over wifi through the Raspberry Pi and an Arduino. But that is a project that will take me some time. Need to learn some python first.

Here is the simple Arduino code I used in the above video:

  
// http://www.bajdi.com
// Pan/tilt kit controlled by joystick

#include <Servo.h> 
 
// Define servos
Servo panServo; 
Servo tiltServo; 

// Servo positions
byte panServoLeft = 10;
byte panServoCenter = 95;
byte panServoRight = 160;
byte panServoPos;
byte tiltServoUp = 160;
byte tiltServoCenter = 90;
byte tiltServoDown = 15;
byte tiltServoPos;

// Analog values of the joystick
int X;    // center = 519 up = 866, down = 77
int Y;    // center = 512 left = 996, right = 18 

#define runEvery(t) for (static typeof(t) _lasttime;(typeof(t))((typeof(t))millis() - _lasttime) > (t);_lasttime += (t))

void setup() 
{ 
  Serial.begin(9600);
  panServoPos = panServoCenter; 
  panServo.attach(7);  // (min=10/max=160) 
  panServo.write(panServoPos);
  
  tiltServoPos = tiltServoCenter;
  tiltServo.attach(6); // (min=15/max=160)
  tiltServo.write(tiltServoPos);
  delay(250);   // Give servos time to move to start position
} 
  
void loop() 
{ 
  runEvery(20)   // Runs every 20ms, slow down servo movement
  {
    X = analogRead(A0);    // read analog value from joystick X-axis
    Y = analogRead(A1);    // read analog value from joystick Y-axis
    
    
    if (X > 540 && tiltServoPos < tiltServoUp)
    {
      tiltServoPos += 1;    // move servo up
    }
    if (X < 500 && tiltServoPos > tiltServoDown)
    {
      tiltServoPos -= 1;    // move servo down
    }
    
    if (Y > 532 && panServoPos < panServoRight)
    {
      panServoPos += 1;      // move servo right
    }
    if (Y < 490 && panServoPos > panServoLeft)
    {
      panServoPos -= 1;      // move servo left
    }
    //move servos
    panServo.write(panServoPos);              
    tiltServo.write(tiltServoPos); 
  }
  
  // Serial printing of variables for debugging
  runEvery(500){             
    Serial.print("X = ");
    Serial.println(X);
    Serial.print("Y = ");
    Serial.println(Y);
    Serial.print("tiltServoPos = ");
    Serial.println(tiltServoPos);
    Serial.print("panServoPos = ");
    Serial.println(panServoPos);
  }
} 

Posted in Arduino sketches | Tagged servo | 6 Responses

Arduino MP3 alarm clock

By Bajdi on June 24, 2013

Arduino mp3 alarm clock

Arduino mp3 alarm clock

After finishing my hexapod I needed another project 🙂
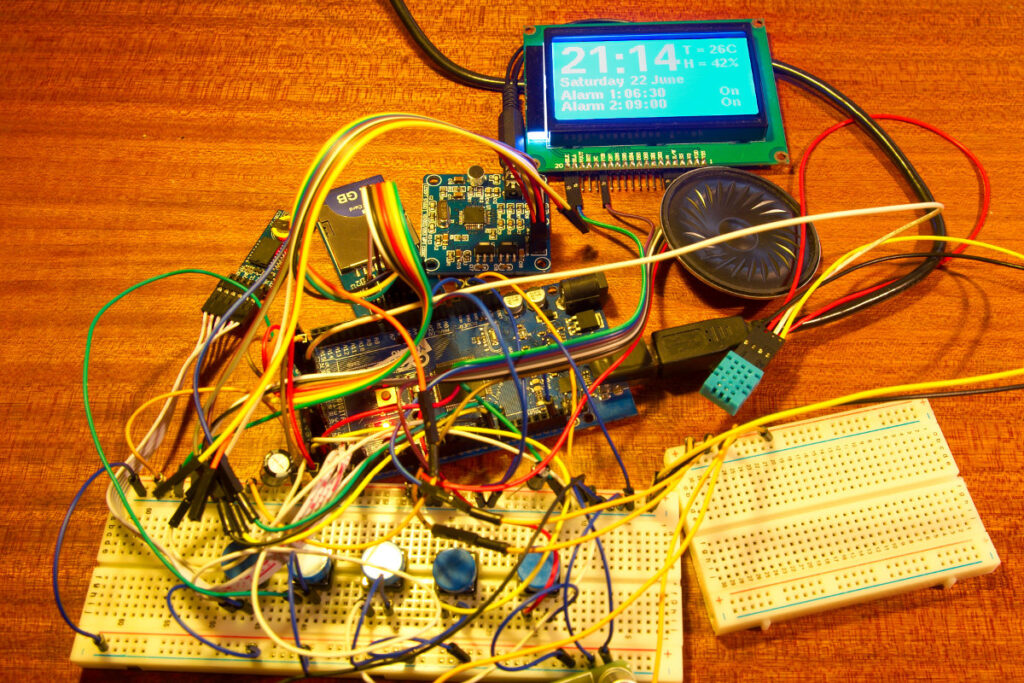
Over the last year I have bought numerous small break out boards on Ebay. So I came up with the idea to make an Arduino MP3 alarm clock. The idea is simple, an LCD that shows the date and time. A couple of buttons to set an alarm, and an MP3 module and small speaker to play an MP3 when the alarm goes of.

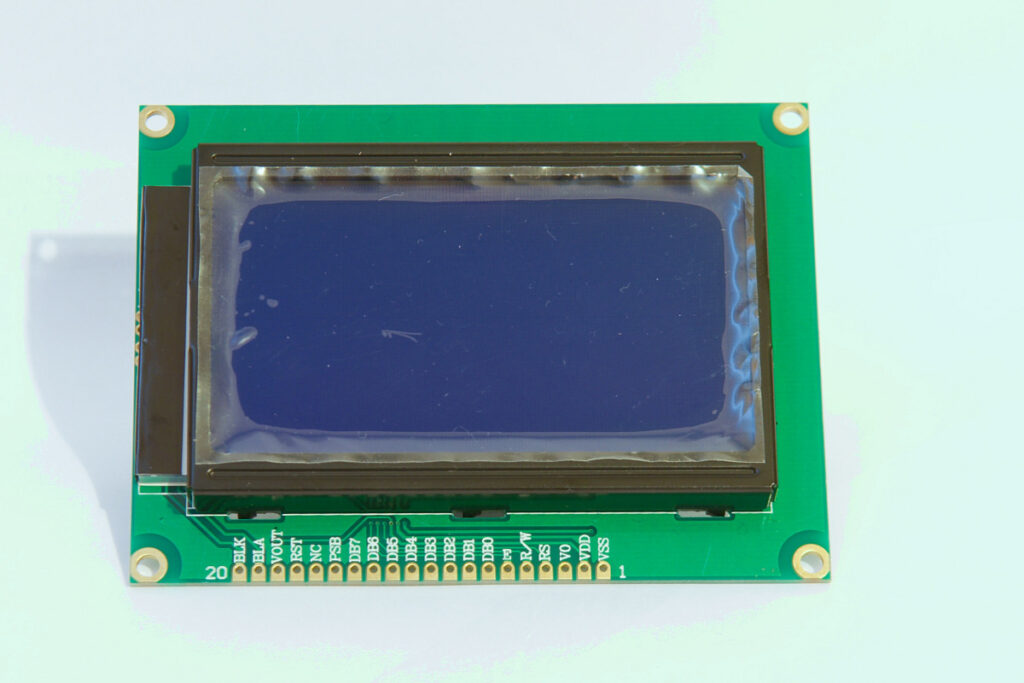
I decided to use my 6€ 12864ZW graphical LCD, with 128×64 pixels it has enough room to display all the things I want. I used the Arduino u8glib and software SPI to make it work with my Arduino Mega2560. I decided to use software SPI because I already had 2 other devices on the SPI bus. It should be possible to use the hardware SPI bus but that would need more coding. You can connect multiple devices to an SPI bus but you can only talk to one at a time.

GLCD 128x64

GLCD 128×64

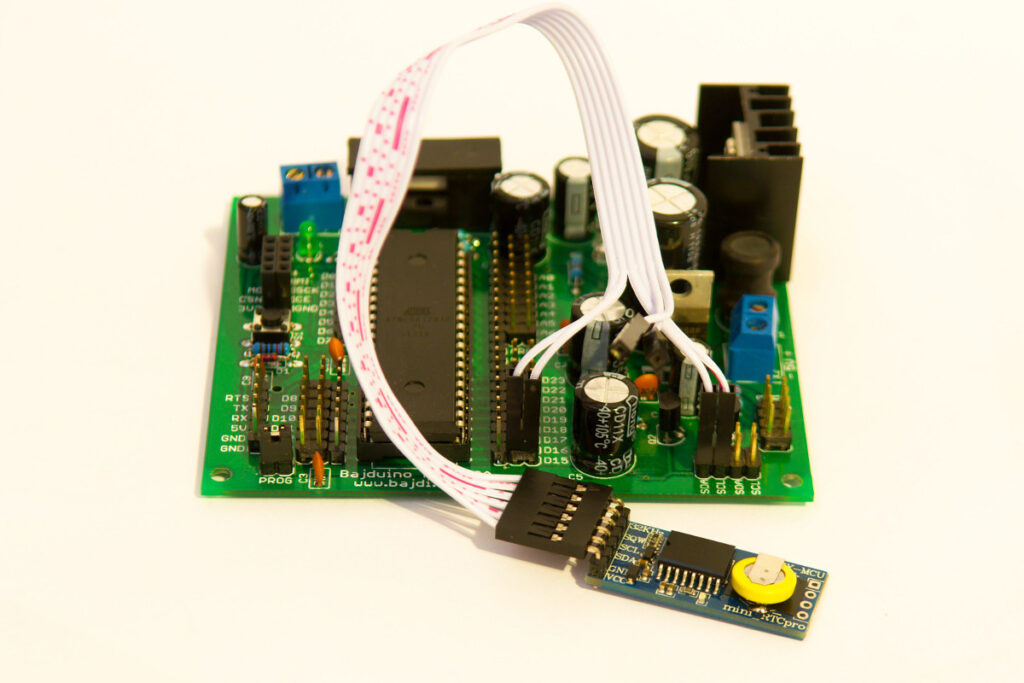
Next thing I needed was an RTC, a real time clock. I have a DS1307 RTC but it’s not very accurate, it “loses” about 1-2 seconds a day. So that’s not very good. Luckily there some more accurate RTC’s, like the DS3231. It’s very similar to the DS1307 and you can even use the same code. I bought a couple of DS3231 modules on Ebay and they work very well. The DS3231 uses the I2C bus to communicate with a micro controller. So you need to connect 2 wires (SDA and SCL) to the Arduino and 5V and GND. I did not use a special library to get the data from the DS3231, just the Arduino Wire library.

DS3231

DS3231

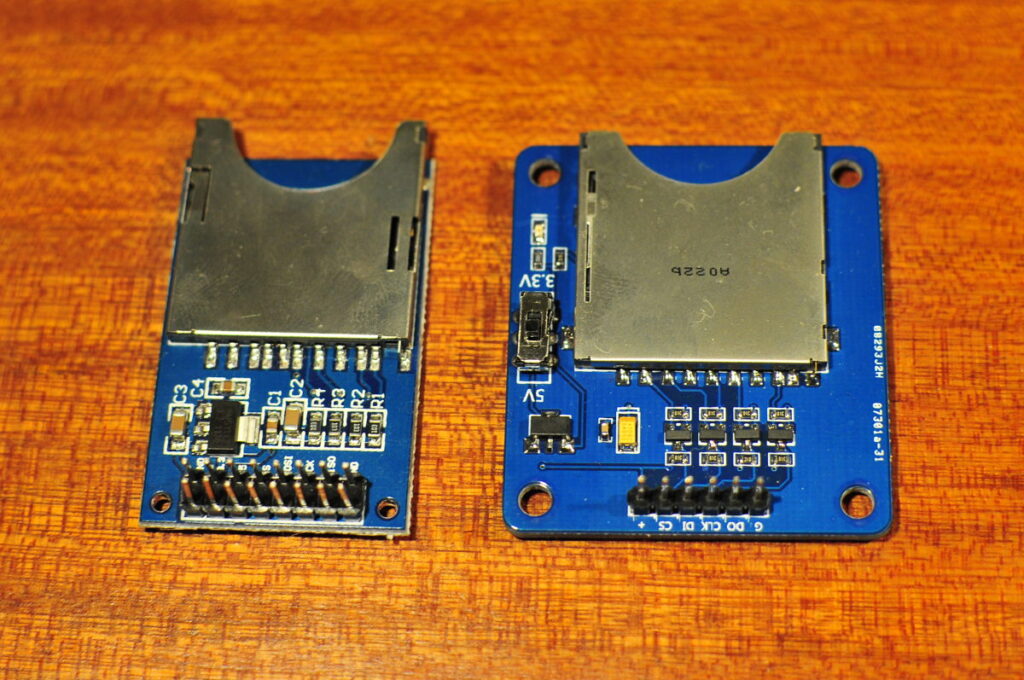
An Arduino does not have enough memory to store an MP3 file so I used a SD card reader and a small SD card to store the MP3 file. The SD card is connected to the SPI pins of the Arduino.

SD modules

SD modules

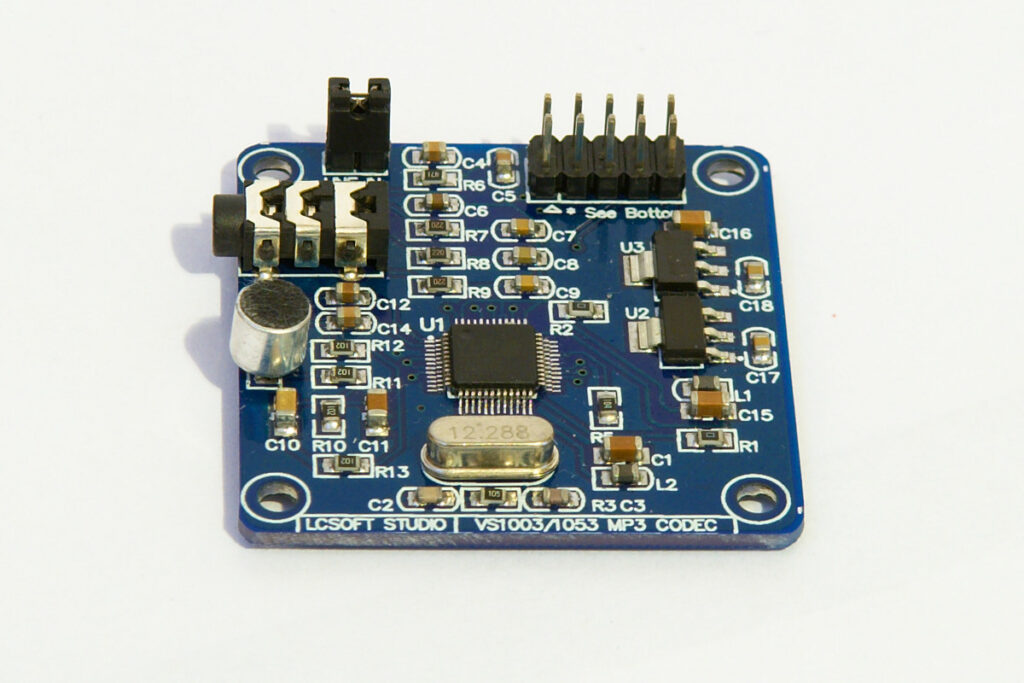
I used an LCsoft VS1053 MP3 module and a small 0,25W speaker (bought from Tayda Electronics) to play MP3’s. The VS1053 MP3 module is also connected to the SPI pins of the Arduino. The LCsoft module needs to be modified to make it play MP3’s. You can read about that in my previous post.

VS1053 MP3 module

VS1053 MP3 module

To be able to set the alarm and turn it of and on I used 5 small push buttons. And as I had a couple of DHT11 sensors laying around I also included one. So I can display the temperature and humidity on the gLCD.
I originally wanted to use my Bajduino Mega 3A for this project but I could not get the VS1053 library to work with the ATmega1284 micro controller. I will try and get it to work at a later time. So I chose an Arduino Mega2560 for this project. An Arduino with an ATmega328 (Duemilanove/Uno/Nano) does not have enough program memory for this project. The u8glib and VS1053 libraries take up a lot of memory. My final sketch compiled in the Arduino IDE 1.0.5 takes up more then 40kb of program memory.
I coded 2 alarms in my sketch, one is only active during the week (Alarm 1 on the LCD) and the second alarm (Alarm 2 on the LCD) is only active during the weekend.
I used 5 push buttons and connected them to 5 digital pins using the internal pullup resistors. 1 to turn on/off alarm 1 and another for the second alarm. The other 3 buttons are used to set the hour and minutes of both alarms. With the first button I can “scroll” to the hour and minutes of both alarms. The other 2 buttons (up/down) are used to set the hour and minutes. Following video shows how it works:

If you would want to replicate this I recommend that you first try out the example sketches of the VS1053 MP3 module. I had to modify one of the files of the library to make it play mp3’s without the song skipping. In the SFEMP3ShieldConfig.h file I had to set define SD_SEL to pin 53 or I got garbled noise. This will make the SD card use pin 53 as chip select. In this file you will also find to which pins the module connects.
The VS1053 will not play just any MP3 file with this library. I first tried some self ripped variable bitrate MP3 files and only got some noise out my speaker. I then ripped some MP3’s with a constant bitrate @ 96kbs. These files played a lot better.

I made a big wire mess connecting all these devices to an Arduino Mega2560. These are all the connections I made (well I left out the power connections):

SD card connections:

  • MISO to pin 50
  • MOSI to pin 51
  • SCK to pin 52
  • SS/CS to pin 53

VS1053 MP3 module:

  • MP3_XCS to pin 6
  • MP3_XDCS to pin 7
  • MP3_DREQ to pin 2
  • MP3_RESET to pin 8
  • MISO to pin 50
  • MOSI to pin 51
  • SCK to pin 52

Graphical LCD (using software SPI)

  • SCK to pin 32
  • MOSI to pin 33
  • CS to pin 30

DS3231 RTC

  • SDA to pin 20
  • SCL to pin 21

Push buttons (using the internal pullup resistors of the ATmega)

  • upButton to pin 22
  • downButton to pin 23
  • alarmSetButton to pin 24;
  • alarmMoFriButton to pin 25;
  • alarmWeButton to pin 38;

DHT11 sensor

  • Signal to pin 42

I first only used USB to power all the devices but it did not work very well. When playing MP3’s the lcd would become dimmer and the MP3 module would start to skip. So I used an external power supply to power the gLCD and MP3 module. The LCD draws about 100mA and the MP3 module a bit more then that (when playing an MP3).

Programming this was pretty straight forward. The libraries for the gLCD and VS1053 make it very easy. They use up a lot of memory though. I check the state of the buttons once every 300 milliseconds. This is done for 2 reasons. First to debounce them and second because they control the value of the hour/minute. If you would check them constantly the value would go up/down so fast it would be impossible to set the alarm time.

My code includes a lot of serial printing at the end of the sketch. I put all the serial print stuff in a separate “void debug”. When you uncomment this code the serial printing will cause the MP3 to skip during playback. Apparently the serial printing takes up a lot of time so the micro controller can’t keep up sending data from the SD card to the VS1053 module.

Here you can download the full sketch: Arduino MP3 Alarm clock

Posted in Arduino sketches | Tagged DS3231, VS1053 | 11 Responses

« PreviousNext »

Recent Posts

  • 3D Printer extruders
  • Mearm forked
  • Arduino time lapse – camera pan device
  • Bought a 199$* Prusa I3 3D printer
  • Simple DIY lab power supply
  • Bajduino
    • Bajduino 1284
    • Bajduino 328
  • Stepper robot arm

Recent Comments

  1. 200+ Arduino Projects List For Final Year Students - He Loves Math on Obstacle avoiding robot made from cheap parts
  2. MP3 Alarm Clock: Crafting Customized wake-Up tunes with Arduino on Arduino MP3 alarm clock
  3. Bas on L9110 H-bridge module
  4. Victor on L9110 H-bridge module
  5. WAQAR AHMED on Dimming led with IR remote control

Archives

  • June 2016
  • August 2015
  • May 2015
  • January 2015
  • December 2014
  • November 2014
  • May 2014
  • April 2014
  • March 2014
  • February 2014
  • January 2014
  • December 2013
  • November 2013
  • October 2013
  • September 2013
  • June 2013
  • May 2013
  • April 2013
  • March 2013
  • February 2013
  • January 2013
  • December 2012
  • November 2012
  • October 2012
  • September 2012
  • August 2012
  • July 2012
  • June 2012
  • May 2012
  • April 2012
  • March 2012
  • February 2012
  • January 2012
  • December 2011

Categories

  • 3D printing
  • Arduino
  • Arduino sketches
  • Bajdupod 996R
  • Bajdupod 9G
  • Bob the biped
  • Buying parts
  • Dagu Rover 5
  • Dagu service droid
  • Gentoo
  • Insectbot
  • Line following robot
  • Raspberry Pi
  • Self balancing bot
  • Bajduino
    • Bajduino 1284
    • Bajduino 328
  • Stepper robot arm

Copyright © 2026 Bajdi electronics.

Powered by WordPress and Hybrid by Bajdi.