Bajdi electronics

Hobby electronics website

Browse: Page 5

Testing switch mode voltage regulators

By Bajdi on February 2, 2014

Switch mode regulators

Switch mode regulators

There are different types of DC-DC regulators. The most common are linear and switch mode regulators. Everyone that has tinkered with electronics has probably used a 78xx series linear regulator. They are easy to use since they don’t need any special components. With most linear regulators you just put a capacitor on the input and one on the output and they will work. Always check the datasheet to see which type and capacity is recommended. Unfortunately linear regulators are very inefficient, because of that they can produce lots of heat. For example if you feed a 7805 (5V linear regulator) 12V and you draw 1A from it, the regulator will need to dissipate 7W of heat. So that 7W goes to waste, not ideal for a battery powered or energy efficient device.

About 2 years ago I started playing with electronics and was browsing Tayda electronics voltage regulator section for a regulator that could output more then 1A. I found the LM2576 5V 3A regulator and ordered some. I didn’t know what I had bought until I read the datasheet.
The LM2576 is a switch mode regulator. It’s a pretty old design, that’s why it’s so cheap ($0,76 @ Tayda). I’m not going to explain how they work, there is wikipedia for that.
Switch mode regulators are more efficient then linear regulators. They can not only lower the voltage (buck converter) some of them can also up the voltage (boost converter) or they can do both (buck-boost converter). Most switch mode regulators need some more components then linear regulators to make them work.
For the LM2576/LM2596 you need 2 capacitors (input/output), a big inductor and a schottky diode. You also need to take into account that you can’t just place the different components like you want on a PCB. The datasheets of these regulators will have a reference design to show you how to place them to get the best results. Not following these guidelines or using components with not the right specifications and you are risking that they just don’t work or produce lots of noise. I have designed a couple of PCB’s using the LM2576 and LM2596 and got them to work, so it’s not that hard 🙂

If you don’t want to design your own PCB’s you can buy small boards with a switch mode regulator on Ebay or from Chinese webshops. So today I decided to test some of the boards I have bought from China.

LM2596
The most popular board is one with an LM2596 adjustable regulator. The LM2596 is a 3A 150kHz stepdown regulator, it’s a pretty old design. More modern switch mode regulators switch at +1MHz.
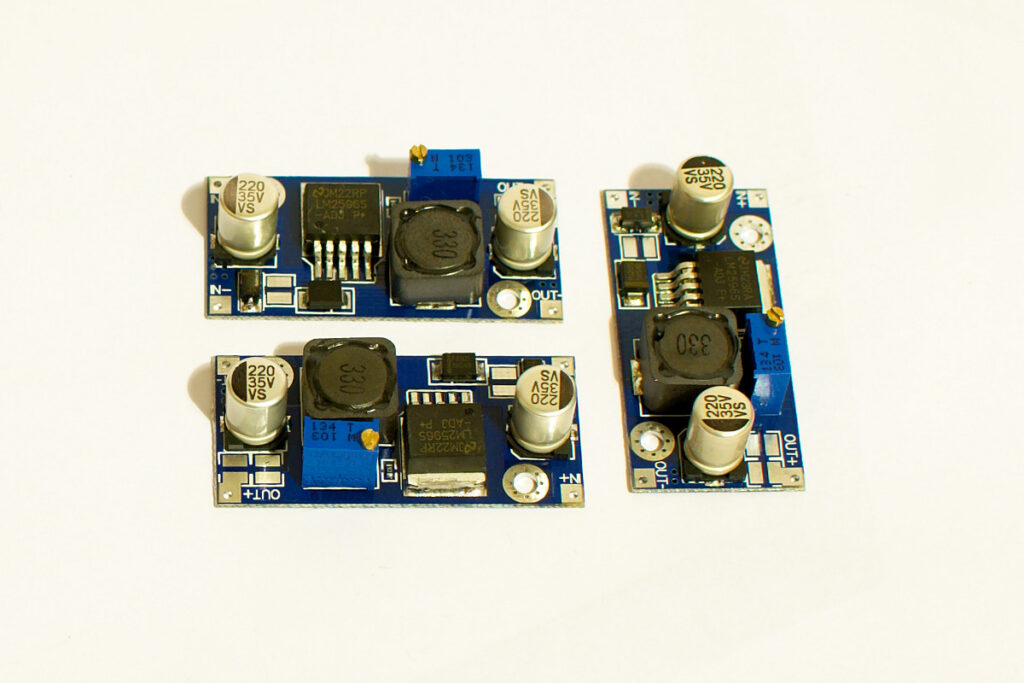
LM2596 board

LM2596 board

You can buy these boards for 1,1€ from Chinese sellers on Ebay. I have a dozen of these boards, some have blue PCB’s, some green others red. They are not exactly the same, some have different capacitors. The ones I have with the blue PCB have capacitors rated at 35V, the ones with the green PCB have a 50V capacitor on the input. The boards have a small potentiometer to set the output voltage.
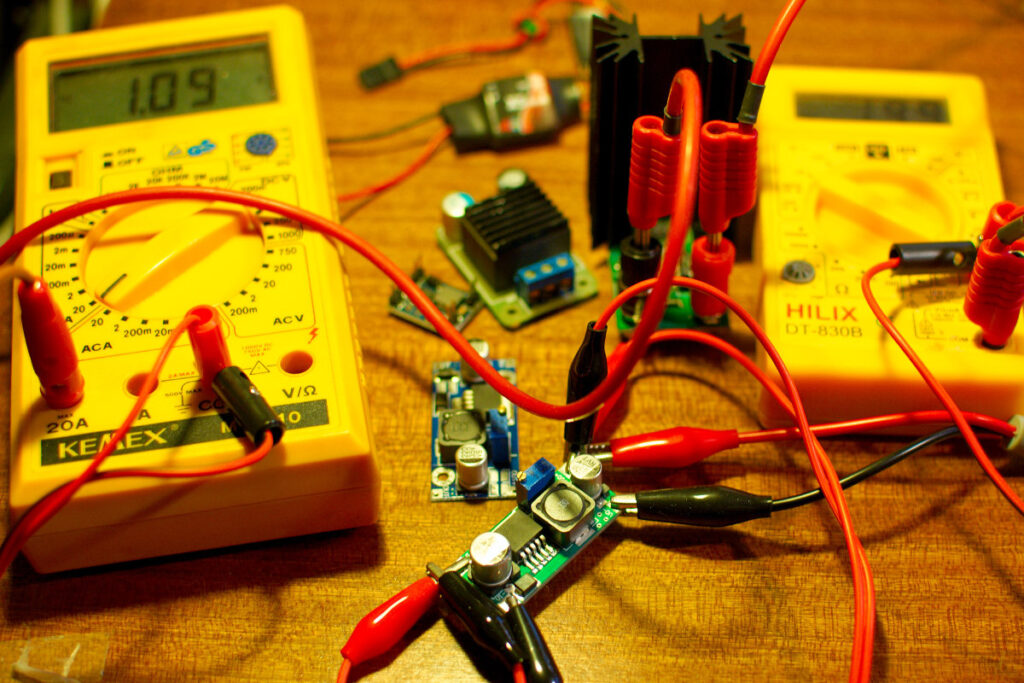
I tested the boards with an input voltage of 8V, 10V and 12V and with a 2A load. I used a Re:load V2 as a constant current dummy load.
@ 8V
output 2A @ 5V
input current 1.65A = efficiency of 75,8%
@ 10V
output 2A @ 5V
input current 1,32A = efficiency of 75,6%
@ 12V
output 2A @ 5V
input current 1,09A = efficiency of 76,5%

These results don’t say everything… With a constant load of 2A the board became to hot to touch. The small PCB can not dissipate enough heat. After about 15 minutes the regulator started to oscillate and the input current started to rise. I would not recommend using these boards with a constant load of more then 1A. I even destroyed one board when trying to draw 3A from it.
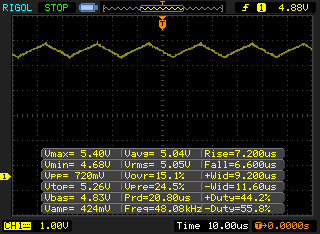
LM2596-oscillating

LM2596-oscillating

I have used LM2596 regulators on my self designed boards, the 5V version in a TO220-5 package. Using a good heatsink and Nichicon capacitors I get an efficiency of 80% and have no trouble with heat.

MP1584
Another 3A adjustable switch mode regulator that I have bought is the MP1584. The MP1584 is a 1.5MHz step down regulator. I bought the regulator on a small board from Electrodragon.
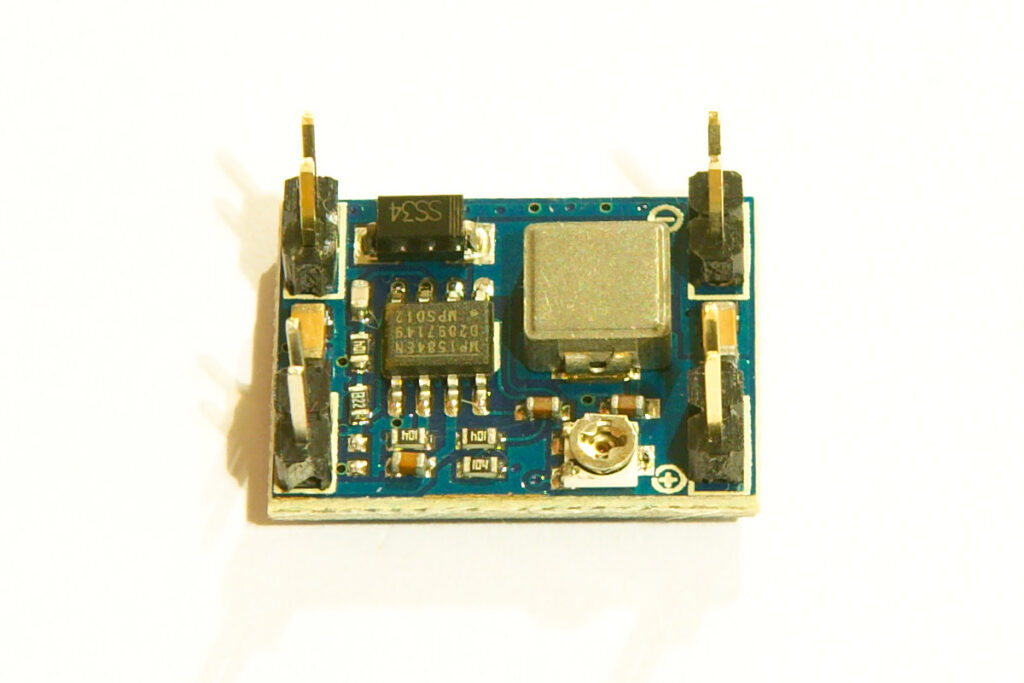
MP1584 3A switchmode voltage regulator

MP1584 3A switchmode voltage regulator

@ 8V
output 2A @ 5V
input current 1.48A = efficiency of 84,5%
@ 10V
output 2A @ 5V
input current 1,08A = efficiency of 92,6%
@ 12V
output 2A @ 5V
input current 0,9A = efficiency of 92,6%

After drawing a constant load of 2A for more then 10 minutes the board became very hot. But the output voltage stayed stable with a peak to peak voltage of only 160mV. Pretty good regulator / board.

KIM-055L
Next regulator I tested is the KIM-055L board I bought on Ebay. This is a 5V 5A switch mode regulator. The board I have has a big heatsink.
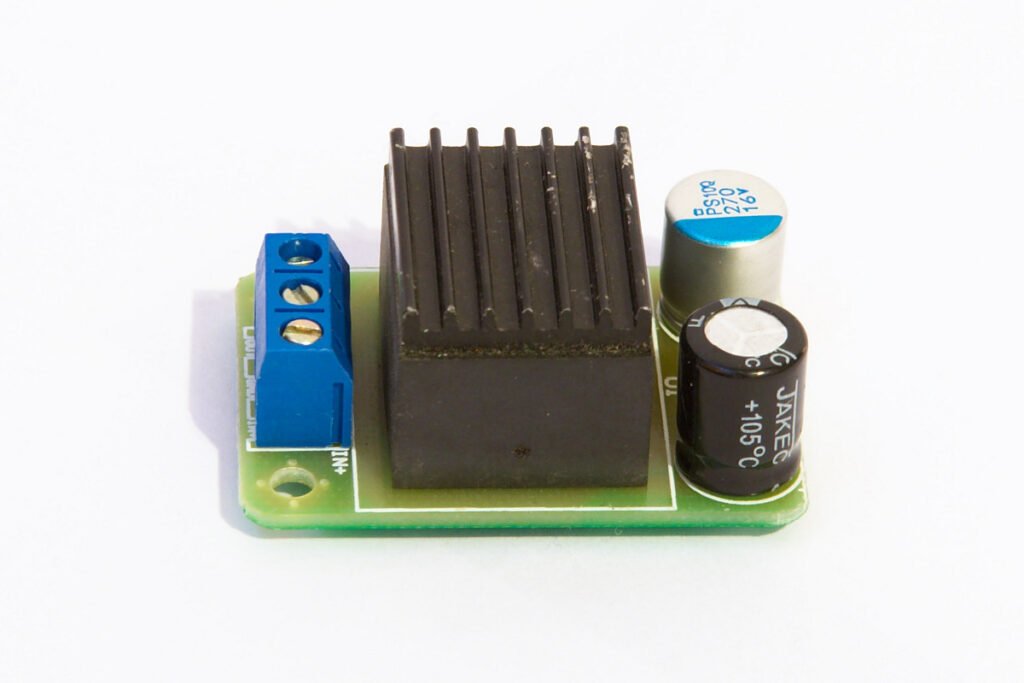
KIM-055L voltage regulator

KIM-055L voltage regulator

With an input voltage of 8V the board can not output 5V. So I only tested it at 10 and 12V.
@ 10V
output 2A @ 5V
input current 1,02A = efficiency of 98%
@ 12V
output 2A @ 5V
input current 0,85A = efficiency of 98%
Even after drawing more then 2A from a longer period of time the heatsink became barely warm. The output voltage stayed stable, peak to peak voltage was 120mV.
Posted in Buying parts | Tagged electronics | 13 Responses

Iteaduino Lite: 5$ Arduino clone

By Bajdi on January 30, 2014

Iteaduino lite

Iteaduino lite

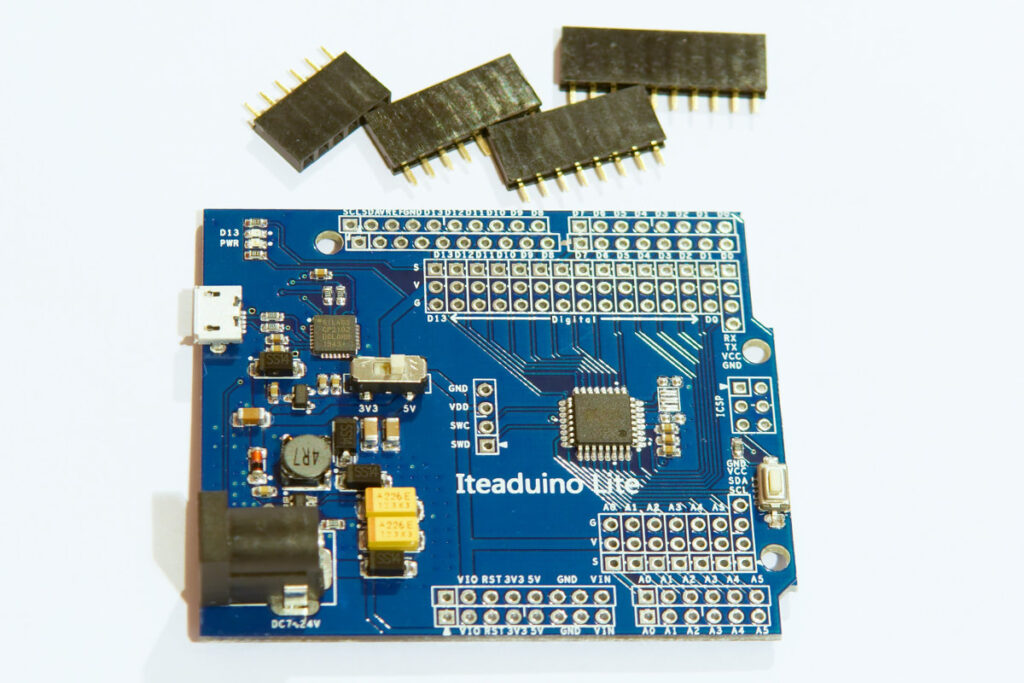
Yesterdag I received another small package from China. Inside it was the Iteaduino Lite. It’s an Arduino clone developed by Iteadstudio. They claim that it’s “the most inexpensive full-sized Arduino derivative board”. I paid 5$ for it on Indiegogo, the early bird price. The current price on the Iteadstudio website is 8$.

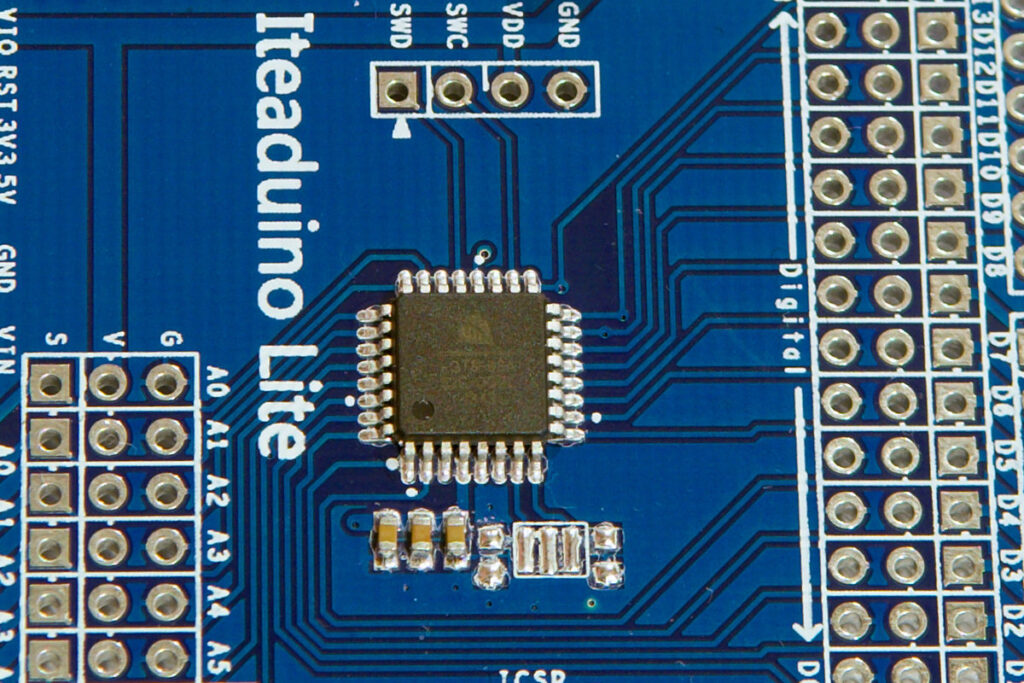
LGT8F88A micro controller

LGT8F88A micro controller

The special thing about it is that it doesn’t use an Atmel micro controller. It uses a micro controller made by the Chinese company LogicGreen Technologies. I’ve never heard of the company and their website doesn’t have much English content. But they make micro controllers. The chip that is used on the Iteaduino Lite is the LGT8F88A, a clone of the Atmel ATmega88. The specifications of the chip look almost the same as the Atmel part. One of the differences is that they claim the chip can run at 32MHz. Atmel only guarantees 20MHz.
The Iteaduino board has a 16MHz micro controller to make it compatible with the Arduino IDE. Changing the clock to 32MHz would require modifications to the Arduino core files else some functions and libraries would not work correctly. LogicGreen has published the following file for people that want to migrate code from the ATmega88 to the LGT8F88A. The LGT8F88A uses a very different clock system compare to the ATmega88. For Arduino users this doesn’t matter, as that is all handled by the Arduino IDE.

To make the Iteaduino Lite work with the Arduino IDE you need to install some files. You need to add the board to the Arduino IDE. I downloaded the following files provided by Iteadstudio. I copied the files in the /sketchbook/hardware/ folder and fired up the Arduino IDE (version 1.0.5). Then you can select the Iteaduino Lite board in the IDE. I have tried some examples that come with the Arduino IDE and the board seems to work. The board uses a CP2102 USB to serial chip and a micro USB connector. My Linux kernel already had support for the CP2102 so I had no problem uploading sketches.

The board has 2 voltage regulators, a 5V and a 3.3V regulator. So you can easily switch between both voltages. The board did not have any headers soldered on it but came with a set of female headers. There are holes to solder lots of male pins on the board, 3 rows next to every pin. One for signal, one for VCC and a row of GND pins. The downside of the board is that the LGT8F88A only has 8kb of flash and 1kb of SRAM. But this is enough for a lot of projects.

Posted in Buying parts | Tagged LGT8F88A | 5 Responses

Dagu service droid: now with Raspberry Pi

By Bajdi on January 26, 2014

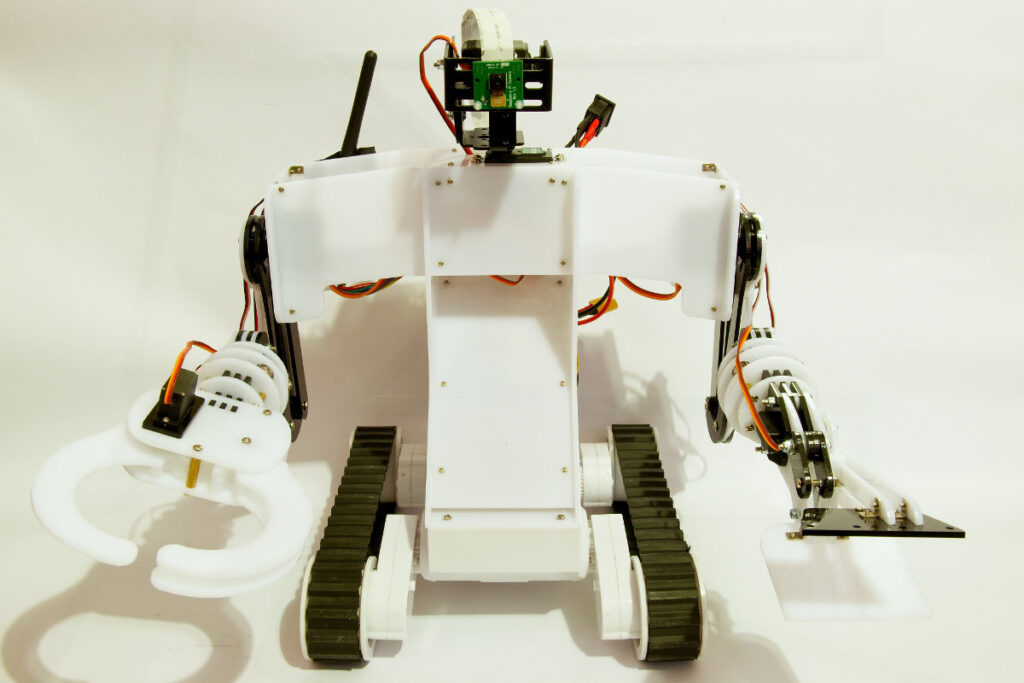
Dagu service droid

Dagu service droid

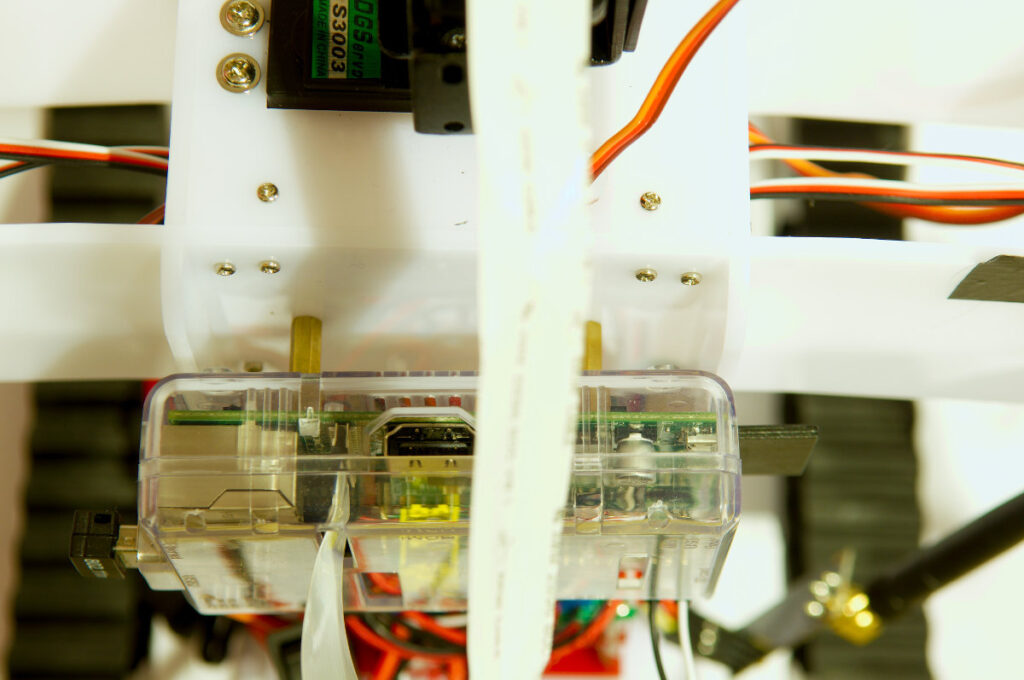
Decided it was time to add a Raspberry Pi to my Dagu service droid.  I already had a Pi shell so that came in handy to attach the Raspberry Pi to the service droid. It has 2 mounting holes in the back which are ideal to mount it. I drilled 2 holes in the back of the torso of the service droid, had to take the torso apart to be able to do this. I then used 2 brass spacers to bolt it in place.

Dagu service droid with raspberry pi

Dagu service droid with raspberry pi

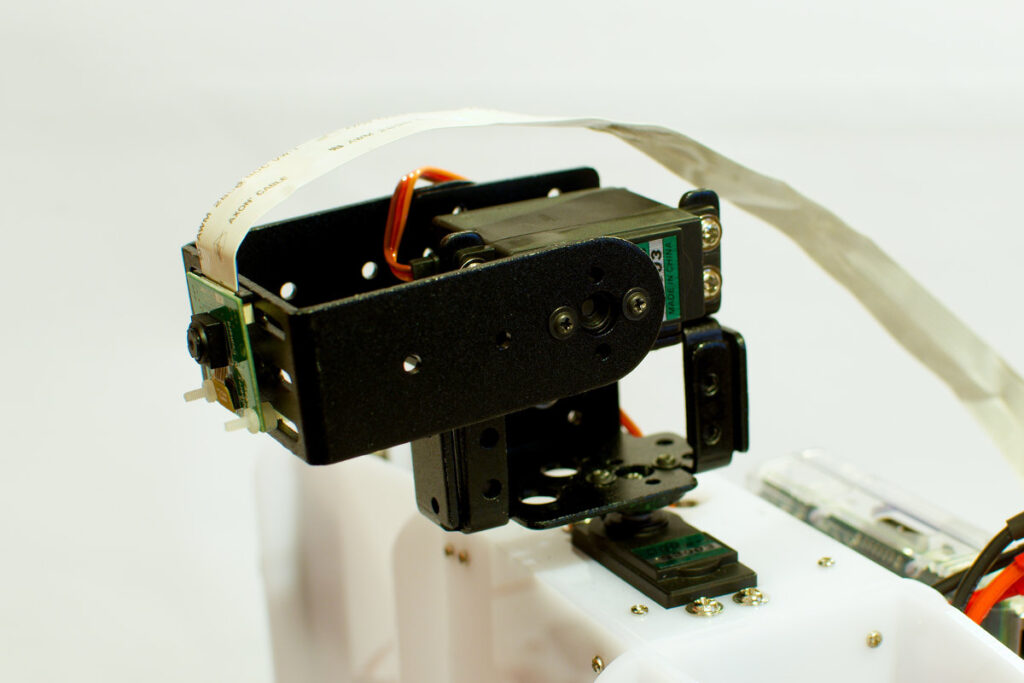
I then fitted the Raspberry Pi camera board to the pan/tilt kit using nylon screws and spacers. The cable that comes with the Camera board was not long enough so I bought a longer (25cm) cable on Ebay. I immediately tried the camera and came to conclusion that the viewing angle is pretty narrow. I also couldn’t move the camera down enough to be able to see the gripper and pincer. So I decided to modify the pan/tilt kit so it sits higher above the torso. I used some metal brackets I had laying around and bolted them together. Now the camera can look down so I can see the gripper and pincer and also the front edge of the robot. Which is handy to accurately position the robot. I have ordered a wide angle lens for a smartphone on Ebay. That should give me a wider viewing angle, if I manage to fit it to the camera board…

Dagu service droid with pan tilt kit

Dagu service droid with pan tilt kit

To power the Raspberry Pi I run 2 wires from the RPi to the Dagu red back spider controller. It has a 3A 5V switch mode regulator so can give more then enough current. At the moment it only powers the RPi.

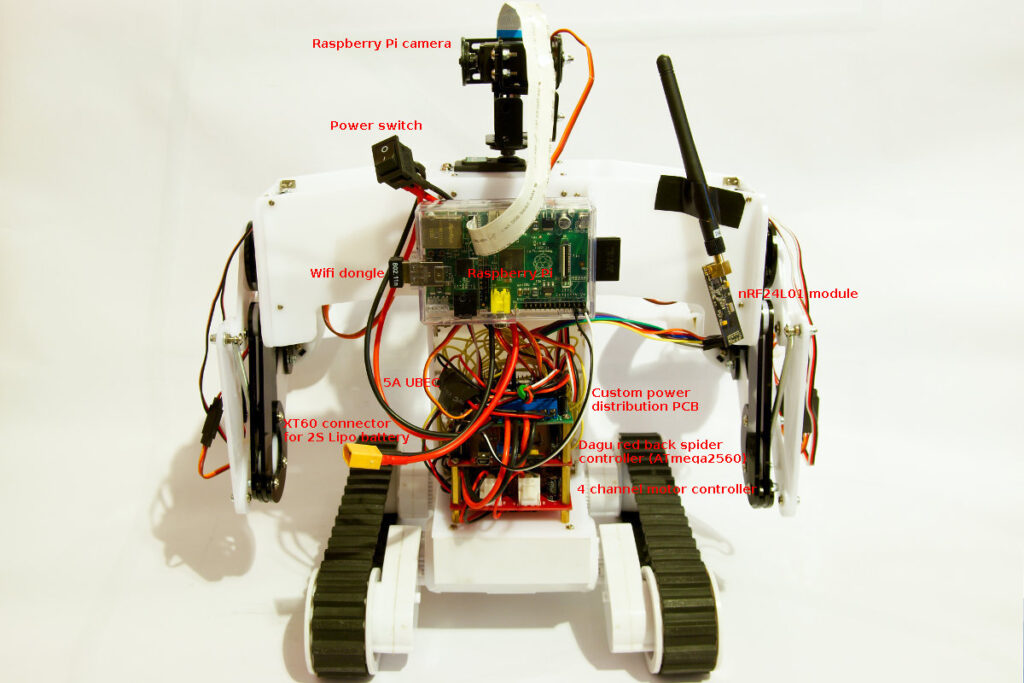
This is the back of my Dagu service droid showing the different parts:

Dagu service droid back view

Dagu service droid back view

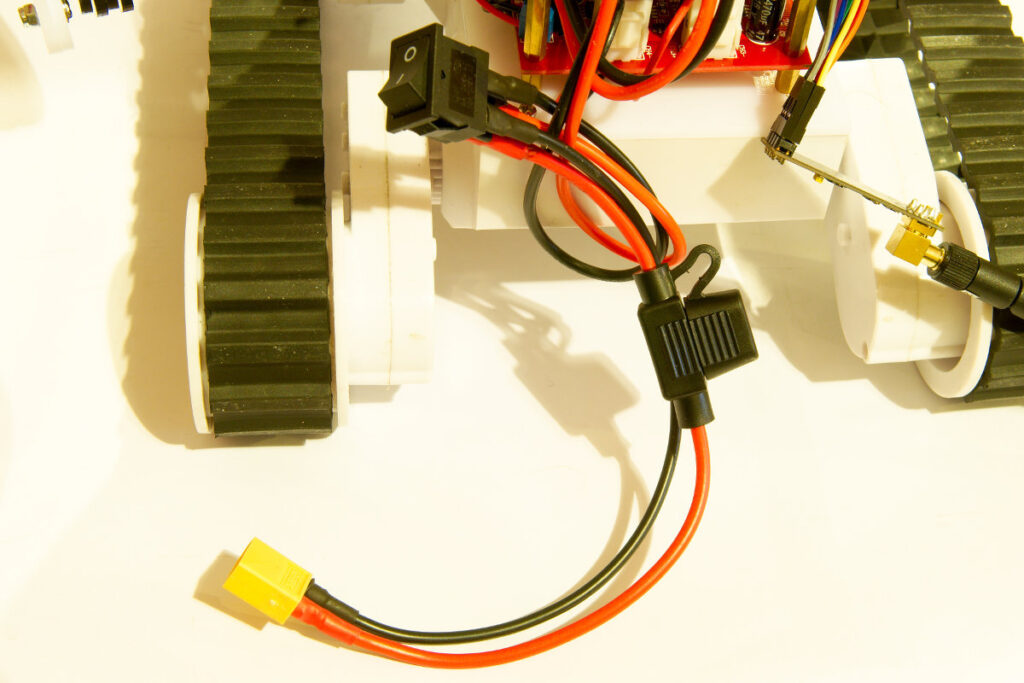
I made a cable with a power switch and a 10A automotive blade fuse to power the robot. The cable has an XT60 connector to connect the battery. I made the cable pretty long as I haven’t decided yet where I’m going to put the battery. The biggest 2S Lipo battery I currently have is a 3000mAh one, I’ll probably order a bigger one from Hobbyking in the near future. I used flexible AWG16 silicon insulated wire to make the cable.

Dagu service droid power cable

Dagu service droid power cable

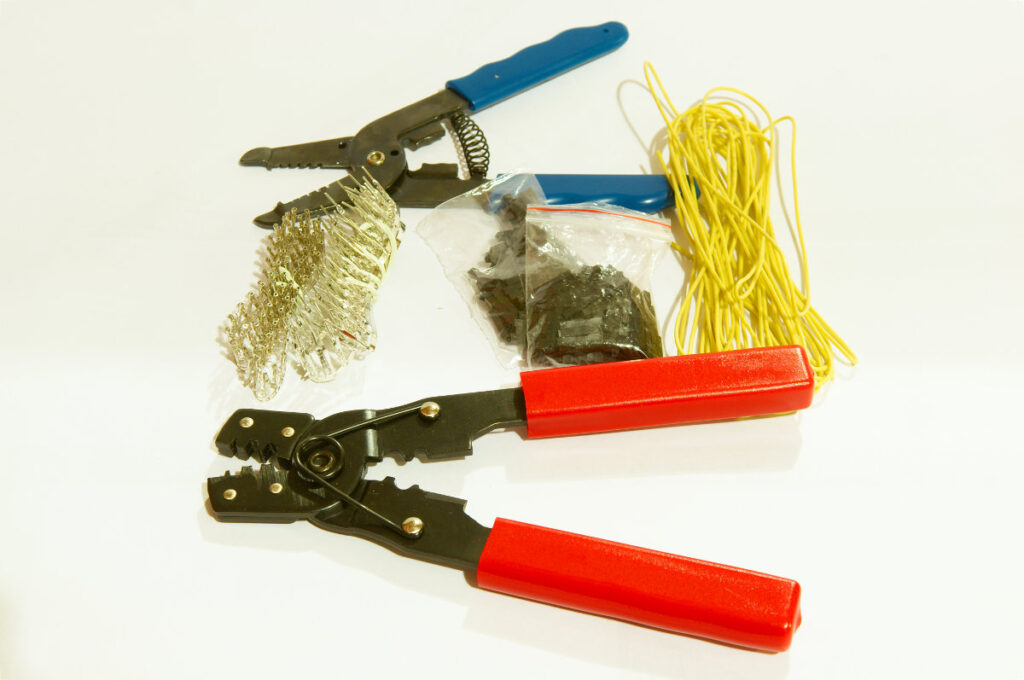
To wire up my first Rover 5 I had used premade cables to connect the motor controller and sensors to the micro controller. This time I made my own wires with Dupont connectors. I’ve bought some new tools to attach Dupont connectors to wires.

Tools for making Dupont connectors

Tools for making Dupont connectors

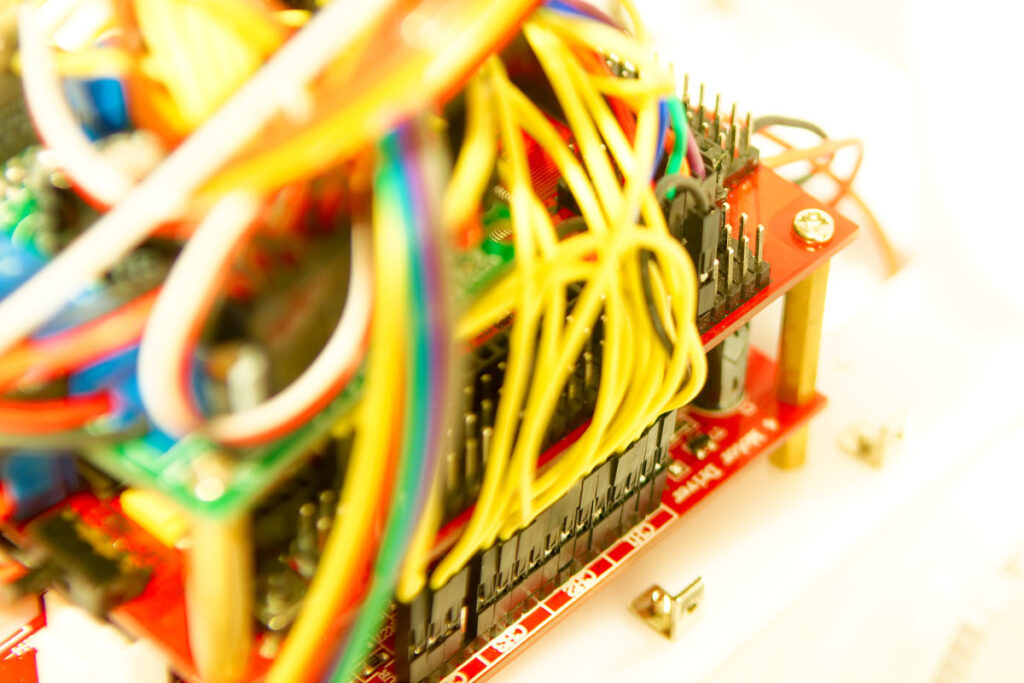
By making my own wires I can minimize the wire mess. The Rover 5 chassis I’m using has 4 motors with encoders. I’ve also attached the current feedback pins of the motor controller. In total I use 16 pins on the micro controller to control the motors. 4 digital outputs for the direction, 4 pwm pins to control the speed, 4 interrupt pins for the encoders and 4 analog inputs for the current feedback. I also use one analog input to monitor the battery voltage. I’m using an ATmega2560 micro controller which has a lot of I/O.

Dagu service droid wiring

Dagu service droid wiring

I’ve found a fantastic Pi camera web interface on the Raspberry Pi forums. Installed it and then let the service droid drive around. I’m still using my Arduino remote control with 2 nRF24L01 modules. This didn’t work very well. Both the nRF24L01 and the Wifi dongle work @ 2.4GHz, they don’t seem to mix very well. The nRF24L01 modules were dropping a lot of packets.
My plan is to remove the nRF24L01 module and control the robot over Wifi. I want to make a web interface using node.js. I don’t have any experience with node.js so it will take me some time to figure out. The idea is that the Raspberry Pi runs a webpage with buttons to control the robot. When pressing the buttons on the webpage the RPi sends commands over serial to the micro controller. The output of the camera should be shown on the same webpage.

I’m also adding some sensors to the robot. Have not decided how much and which sensors I will add. At the moment I’m experimenting with an ACS712 current sensor to detect if a servo is stalled. I might add 2 of these sensors, one for the gripper and one for the pincer.

Posted in Dagu service droid | Tagged Raspberry Pi, robot | Leave a response

« PreviousNext »

Recent Posts

  • 3D Printer extruders
  • Mearm forked
  • Arduino time lapse – camera pan device
  • Bought a 199$* Prusa I3 3D printer
  • Simple DIY lab power supply
  • Bajduino
    • Bajduino 1284
    • Bajduino 328
  • Stepper robot arm

Recent Comments

  1. 200+ Arduino Projects List For Final Year Students - He Loves Math on Obstacle avoiding robot made from cheap parts
  2. MP3 Alarm Clock: Crafting Customized wake-Up tunes with Arduino on Arduino MP3 alarm clock
  3. Bas on L9110 H-bridge module
  4. Victor on L9110 H-bridge module
  5. WAQAR AHMED on Dimming led with IR remote control

Archives

  • June 2016
  • August 2015
  • May 2015
  • January 2015
  • December 2014
  • November 2014
  • May 2014
  • April 2014
  • March 2014
  • February 2014
  • January 2014
  • December 2013
  • November 2013
  • October 2013
  • September 2013
  • June 2013
  • May 2013
  • April 2013
  • March 2013
  • February 2013
  • January 2013
  • December 2012
  • November 2012
  • October 2012
  • September 2012
  • August 2012
  • July 2012
  • June 2012
  • May 2012
  • April 2012
  • March 2012
  • February 2012
  • January 2012
  • December 2011

Categories

  • 3D printing
  • Arduino
  • Arduino sketches
  • Bajdupod 996R
  • Bajdupod 9G
  • Bob the biped
  • Buying parts
  • Dagu Rover 5
  • Dagu service droid
  • Gentoo
  • Insectbot
  • Line following robot
  • Raspberry Pi
  • Self balancing bot
  • Bajduino
    • Bajduino 1284
    • Bajduino 328
  • Stepper robot arm

Copyright © 2026 Bajdi electronics.

Powered by WordPress and Hybrid by Bajdi.