By Bajdi on March 2, 2012
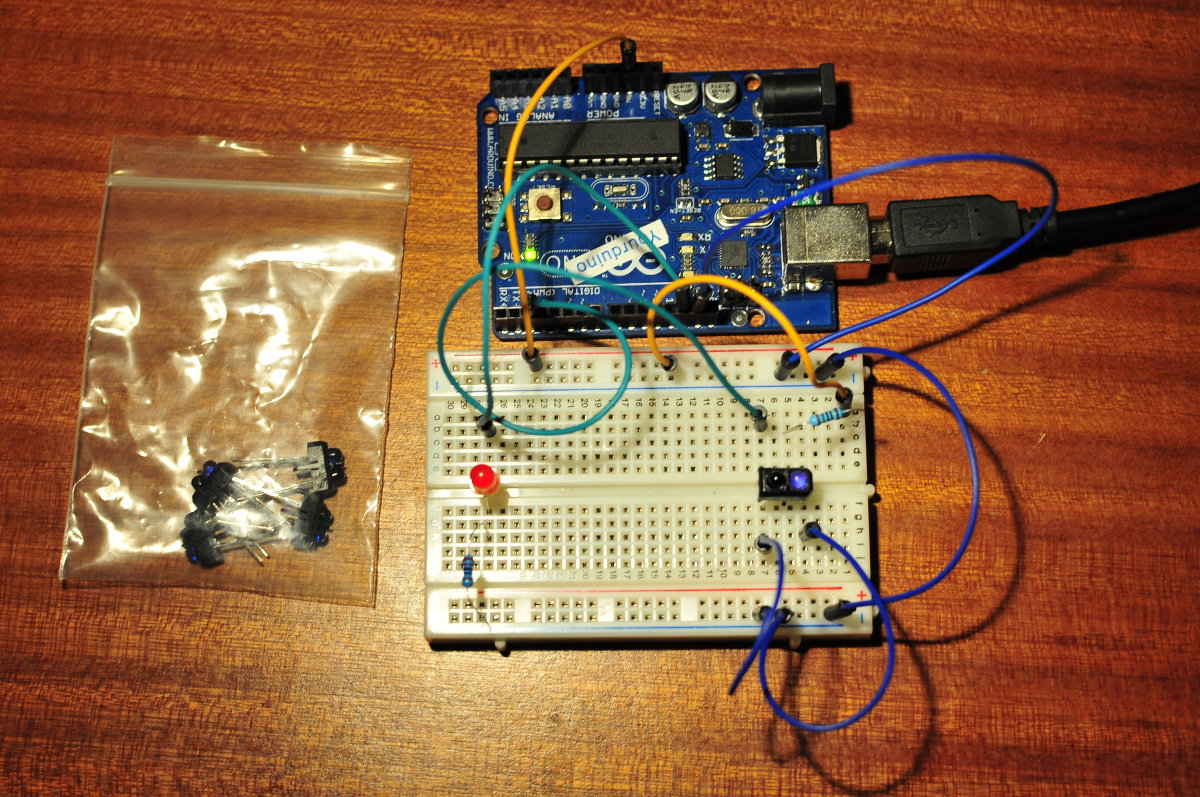
TCRT5000 connected to Arduino Uno
I nearly forgot I bought these little sensors. The TCRT5000 is a reflective infrared sensor, it’s a small plastic holder with an IR led and a photo transistor. The IR led emits invisible IR light, when an object is placed in front of it the light is bounced back to the phototransistor. The TCRT5000 has 4 pins and is very easy to connect to an Arduino. You can download the datasheet here to see the pinout.
The collector (C) of the phototransistor is connected to the digital pin on the Arduino, the emitter (E) is connected to ground. The anode (A) of the IR led is connected to a 100ohm resistor, the other end of the resistor goes to 5V. The cathode of the led goes to ground. The range of these little sensors is not big and from testing I learned that they are very sensitive to the light present in the room. The range is only a couple of centimetres. The best thing about them is that they are very cheap, I bought 5 of these from Yourduino for 2$. They can be used to make an encoder or to sense objects that are really close 🙂
Here is the sketch that I used to try them out:
/* http://www.bajdi.com
   TCRT5000 sensor connected to Arduino Uno
   TCRT5000 pins: (see datasheet http://www.vishay.com/docs/83760/tcrt5000.pdf )
     C = Arduino digital pin 2
     E = GND
     A = 100 ohm resistor, other end of resistor to 5V
     C = GND
*/
const int tcrtPin = 2;     // connected to the TCRT5000 C pin
const int led =  13;      // the number of the LED pin

// variables will change:
int tcrtState = 0;         // variable for reading the TCRT5000 status

void setup() {
  // initialize the LED pin as an output:
  pinMode(led, OUTPUT);
  // initialize the tcrt5000 pin as an input, and turn on the internal pullup resistors:
  pinMode(tcrtPin, INPUT);
  digitalWrite(tcrtPin, HIGH);
}

void loop(){
  // read the state of the tcrt5000:
  tcrtState = digitalRead(tcrtPin);

  // check if the tcrt5000 sensor detects something.
  // if it is, the tcrtState is LOW:
  if (tcrtState == LOW) {
    // turn LED on:
    digitalWrite(led, HIGH);
  }
  else {
    // turn LED off:
    digitalWrite(led, LOW);
  }
}
Posted in Arduino sketches | Tagged TCRT5000 |
By Bajdi on February 24, 2012
Found some time today to add some servos and sensors to my Rover 5. I started by drilling some more holes in the plexi glass to mount the servos and my little power PCB. I used nylon M2 nuts and bolts to fix the servos to the plexi glass, found these on ebay. To mount the SRF06 ultrasonic sensor to the micro 9G servo I bought a small ABS box on ebay. I made some holes in it to mount the SRF06 sensor, quite happy with the result. On the front I mounted a sensor pan / tilt kit with the Dagu IR compound eye mounted on top of it. I have not written any code for the IR compound eye but I’ve found a test sketch on letsmakerobots, so that gives me something to experiment with.
Posted in Dagu Rover 5 | Tagged robot, ultrasonic |
By Bajdi on February 23, 2012
Now that I have my Rover 5 working I want to add a couple of servos with SRF06 ultrasonic sensors mounted on top of them. So I can let the SRF06 sensors detect an obstacle. The Arduino IDE comes with a simple servo library. One of the examples that comes with this library is a sweep example. It’s a very simple sketch that lets the servo move from 0 to 180 degrees. It uses the delay function to wait for the servo to reach it’s position. The library does not have any function to set the speed of the servo. Of course with some programming magic and making use of the millis function you can make a speed adjustable sweep sketch. But this is a bit to complex for a newbie like me.
After some searching on the Arduino forum I stumbled on the VarSpeedServo library. This library has a function to set the speed of the servo. Unfortunately it doesn’t come with any examples. But there was a sketch posted on the forum to sweep 4 servos. I copied the sketch and simplified it to just sweep 1 servo. You have to watch out with the speed settings. You can set the speed between 1 and 255, but no servo will be able to handle a speed of 255. After some testing I found that a speed of 30 was fast enough to let a servo sweep with the SRF06 on top of it. I wonder if this library will work with a continuous rotation servo. Would be very handy to control the speed of such a servo. Something that I will have to try out.
Here is the sketch to sweep one servo:
// speed controlled Servo Sweep
// see: http://arduino.cc/forum/index.php/topic,61586.0.html
//
// Michael Margolis 4 August 2011
// edited by http://www.bajdi.com

#include <VarSpeedServo.h>

VarSpeedServo MyServo;        // servo objects

int servoSpeeds = 30; // sweep speed, 1 is slowest, 255 fastest)
int servoMinPosition = 0; // the minumum servo angle
int servoMaxPosition = 180; // the maximum servo angle

void setup()
{

  MyServo.attach(9);
  MyServo.slowmove(servoMinPosition,servoSpeeds) ; // start sweeping from min position

}

void loop()
{
  // sweep the servos

  if( MyServo.read() == servoMinPosition)
  {
    MyServo.slowmove(servoMaxPosition,servoSpeeds) ;
  }
  else if( MyServo.read() == servoMaxPosition)
  {
    MyServo.slowmove(servoMinPosition,servoSpeeds) ;
  }

}
Posted in Arduino sketches | Tagged servo |