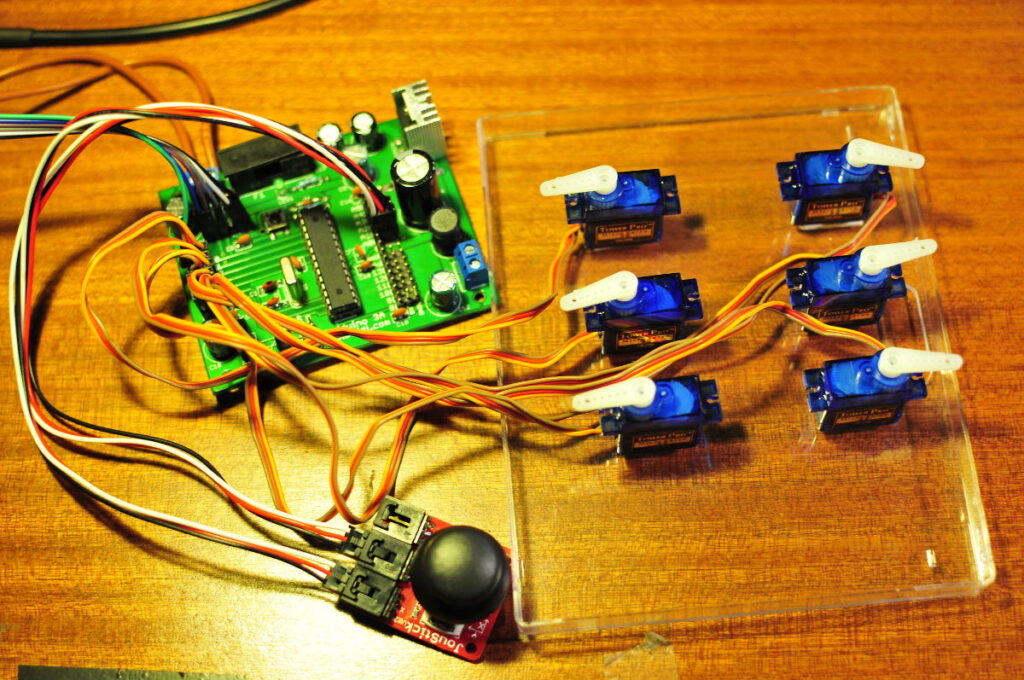
So I have made another robot. It is a cheap small simple robot, most of the parts were bought on Ebay. Ebay has become my primary source for robot parts. So much stuff these days is made in China. And Ebay is a great place to buy it.
For the chassis I used a plastic box I had lying around.
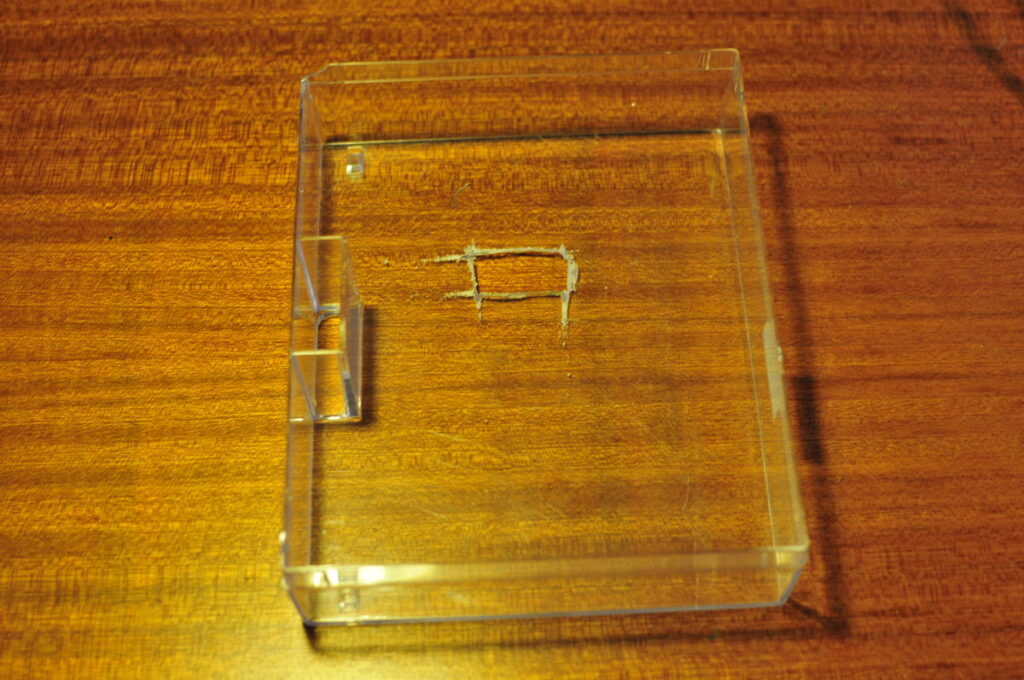
Plastic box
I bought 2 of the cheapest geared motors with wheels on Ebay. You can easily find them on Ebay when you search for “robot motor”. These are DC motors with small gears to reduce the speed. The motors come without wires, so I soldered some wires to the terminals. These motors draw very little current so you don’t need to use thick wire.

Motors wheels
I then stuck the motors to the chassis with some double sided tape.
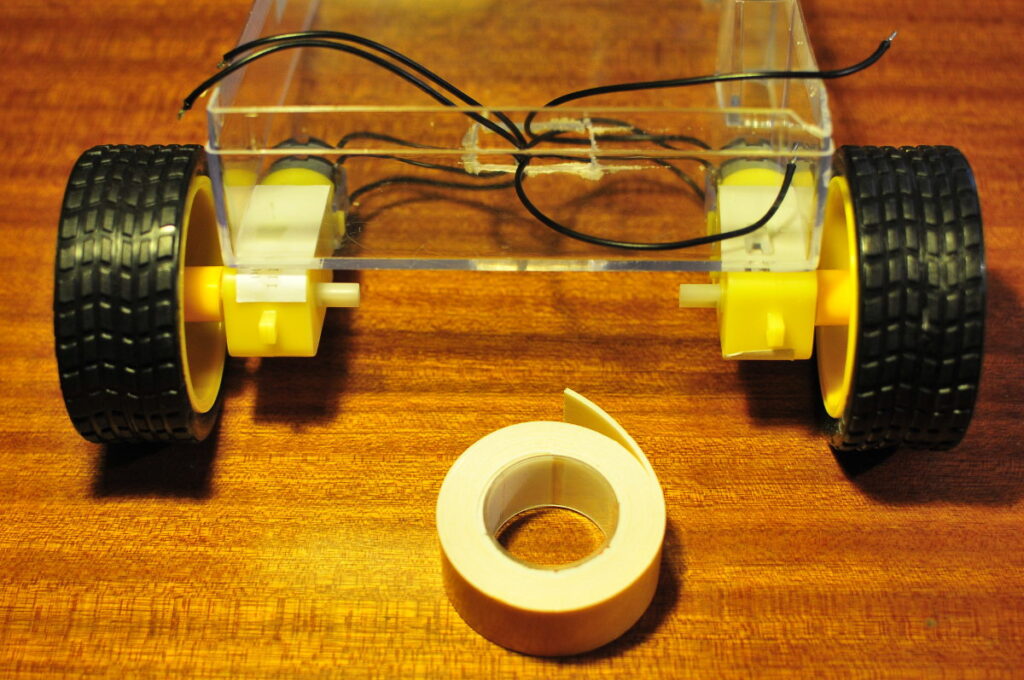
Chassis wheels
I bought a small castor wheel on Ebay and used the same method to attach it to the chassis. By using a castor wheel the robot can almost turn around it’s own radius, which has its benefits.
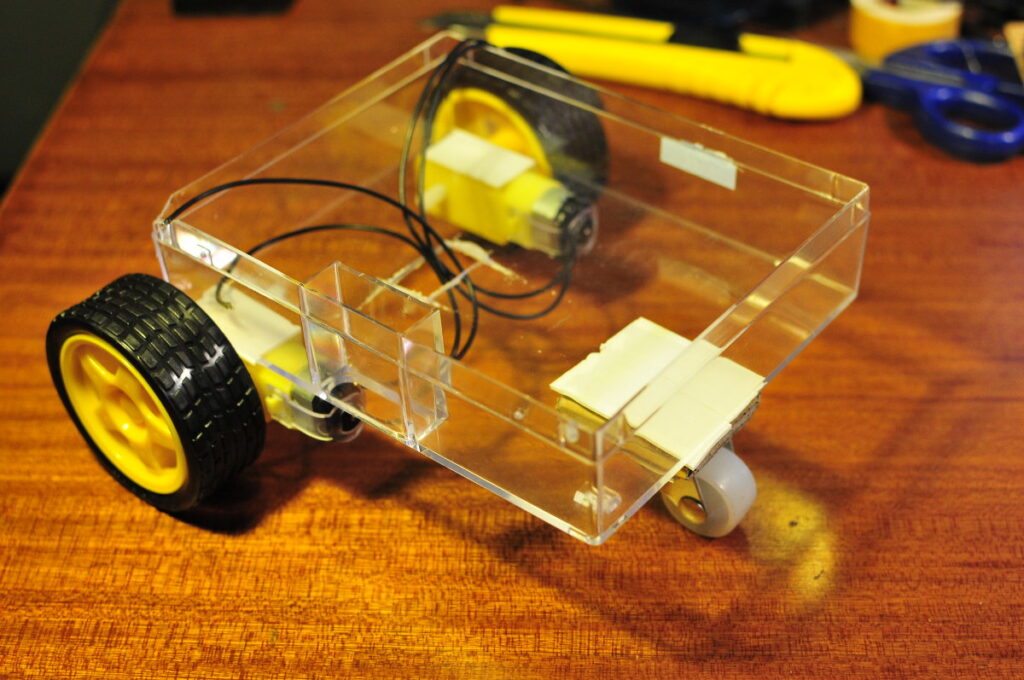
Chassis with 3 wheels
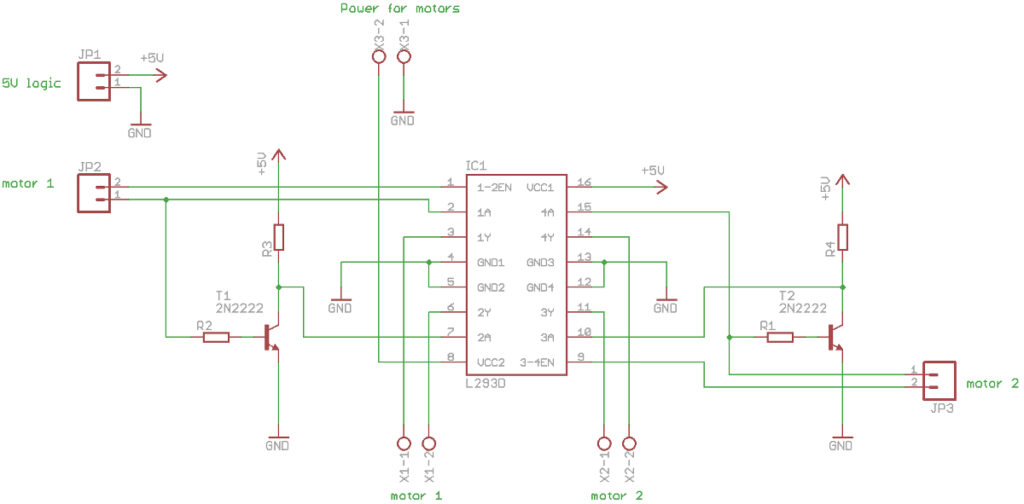
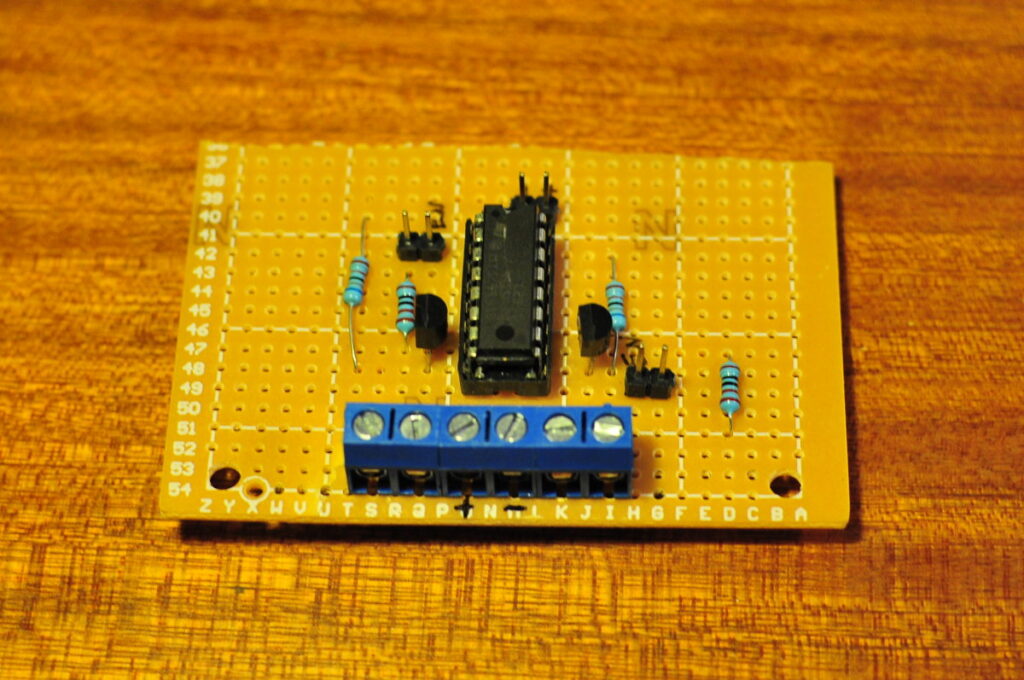
To control the motors I chose to make my own motor controller based on the L293D h-bridge and a couple of transistors and resistors. There are different ways to control a L293D chip from a micro controller. By using 2 transistors I only need 4 pins on the Arduino to control the 2 motors. Each motor is controlled by 2 pins, one is a pwm pin to control the speed of the motor. The other pin controls the direction of the motor by turning it low or high. I soldered all the parts on some perfboard. The L293D chip can be found cheaply on Ebay.
I drew the following schematic in Eagle:
L293D-schematic
L293d h-bridge
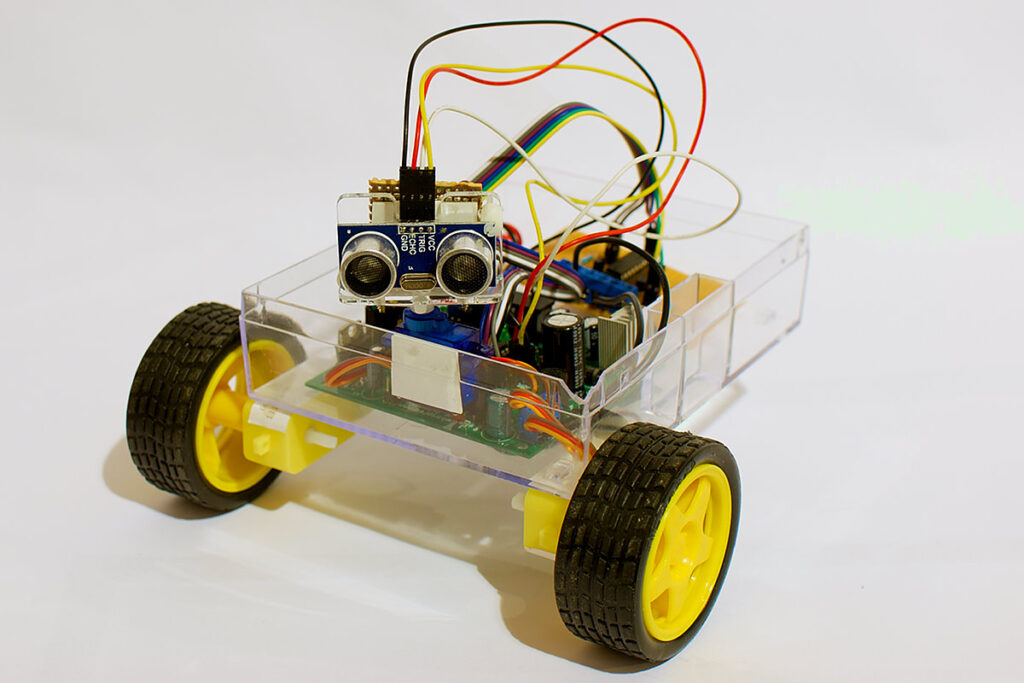
To detect obstacles I used an ultrasonic SR04 sensor. These sensors only cost a couple of dollars on Ebay. This sensor is well supported by Arduino, several people have written libraries for the SR04 sensor. I wanted to be able to sweep the sensor so I mounted it on a small SG90 servo. Want to guess where I bought it from? Ebay of course 🙂 I did use a part that didn’t come from Ebay. I recently bought some things from Rocket brand studios and ordered a couple of sensor brackets. These brackets are laser cut from acrylic. They are made to mount a SR04 sensor on a small servo. I then attached the servo and sensor to the chassis with some more double sided tape.
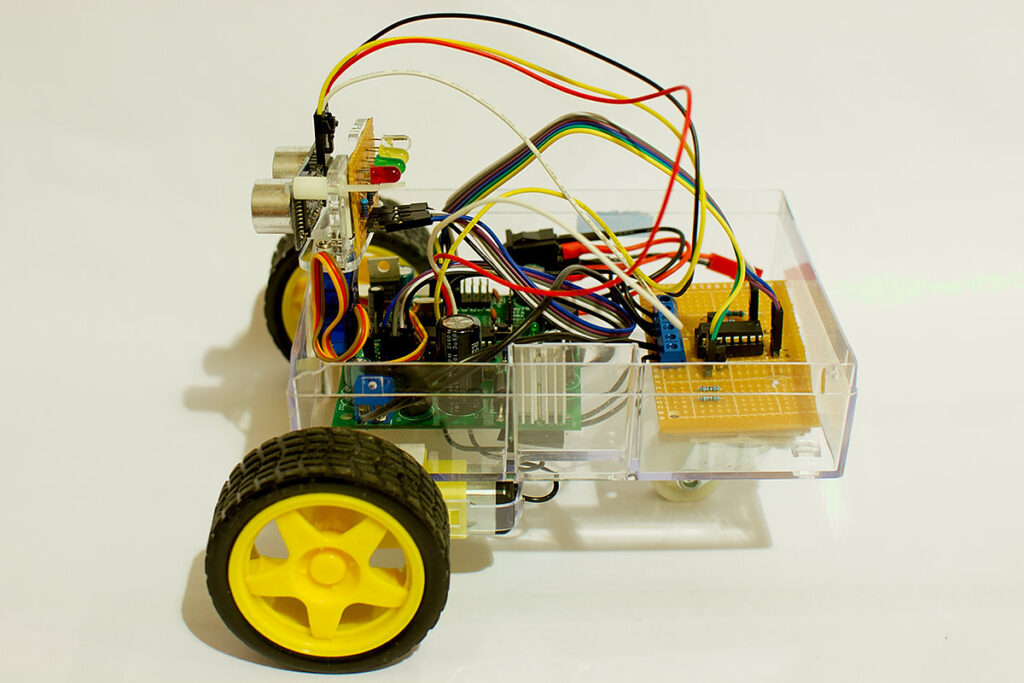
For the micro controller I used an ATmega328P-PU with Arduino bootloader. I used one of my own PCB’s, my Bajduino 3A. The board has a 3A 5V regulator and lots of male pins so I could easily hook up the sensor and servo and L293D board to the micro controller pins. I used a 2S Lipo battery to power the robot. A 2S Lipo gives about 8.4V when fully charged, this is a bit to much for the small dc motors. So I used the 5V from my Bajduino 3A to power the motors. My Bajduino 3A can give 3 amps, more then enough for the motors. This is not recommended though as motors can give voltage spikes and possibly damage your micro controller. But with these small motors it works well.
I soldered some leds with current limiting resistors to a piece of perfboard and stuck it on the back of the sensor bracket. This is a handy way to see what is going on in the micro controller. For every direction, forward/backward/left/right a led lights up. I hooked everything up with some Dupont cable.
This is the result:
Obstacle avoiding robot
Obstacle avoiding robot
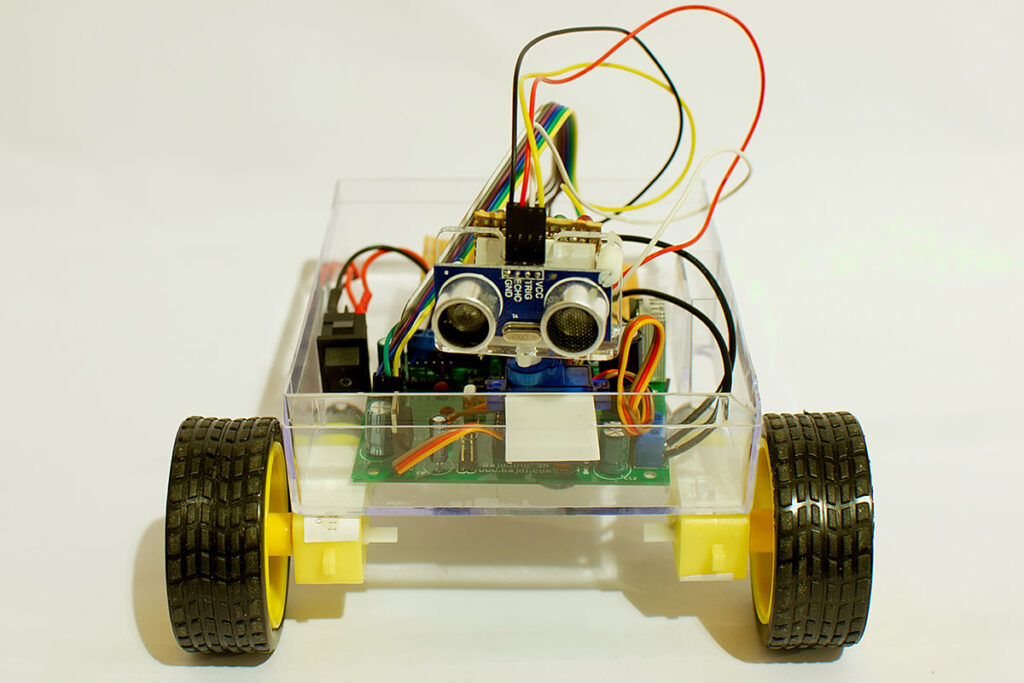
Obstacle avoiding robot
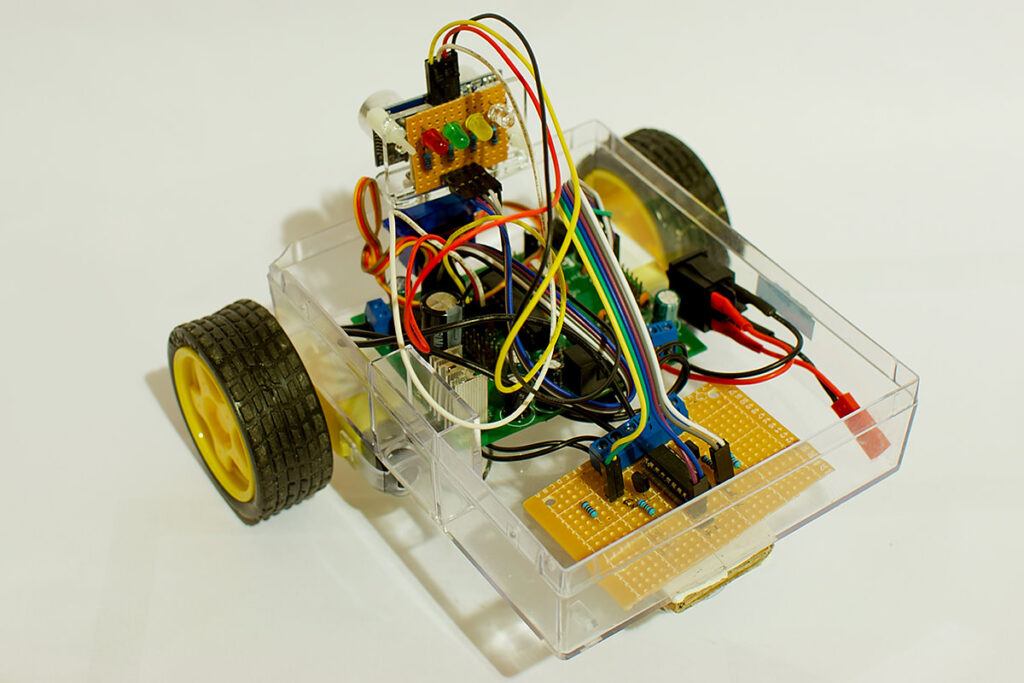
Obstacle avoiding robot
I spent quite a bit of time writing code for this little robot. Most obstacle avoiding Arduino sketches I have seen use lots of delays in the code. When the robot detects an obstacle in its path it stops and lets the servo look left and right to determine which way it should go. Between every step there is a delay in the code. I wanted to write a sketch without any delays so it would be faster and smoother. The code uses lots of timers based on the millis function. The servo sweeps all the time and the values of the SR04 ultrasonic sensor are constantly taken. So the moment the robot detects an obstacle it immediately knows which way it should turn. It took me many hours to get right. But it seems to work pretty well.
Here is a video:
This is the code I used:
/*
 http://www.bajdi.com (your number one source for buggy Arduino sketches)
 Simple obstacle avoiding robot made from parts mostly sourced from Ebay
 Micro controller = ATmega328P-PU with Arduino bootloader (3.5$ @ Eb.. noooo Tayda Electronics)
 Using a L293D (bought from my favourite Ebay seller Polida) to drive 2 yellow "Ebay motors with yellow wheels"
 Detecting obstacles with an SR04 ultrasonic sensor (uber cheap on Ebay)
 SR04 sensor mounted on SG90 servo (you can get these servo very cheap on ... oh yes you guessed it: EBay)
*/

#include <NewPing.h>  //library for the SR04 ultrasonic sensor
#include <Servo.h>    //servo library, SR04 is mounted on this servo

Servo myservo;

#define TRIGGER_PIN  A1  //using analog pins as digital for SR04 sensor
#define ECHO_PIN     A0  //because I just happened to plug them in here
#define MAX_DISTANCE 200 //the sensor can't measure much further then this distance

NewPing sonar(TRIGGER_PIN, ECHO_PIN, MAX_DISTANCE);

#define runEvery(t) for (static typeof(t) _lasttime;(typeof(t))((typeof(t))millis() - _lasttime) > (t);_lasttime += (t))

const int EN1 = 6;        //enable motor 1 = pin 1 of L293D
const int direction1 = 7; //direcion motor 1 = pin 2 of L293D
const int EN2 = 5;        //enable motor 2 = pin 9 of L293D
const int direction2 = 4; //direction motor 2 = pin 15 of L293D
// leds are very handy for testing
const int redLed = 10;    // this led will lit up when the robot drives forward
const int greenLed = 11;  // this led will lit up when the robot drives backward
const int yellowLed = 12; // this led will lit up when the robot turns left
const int whiteLed = 13;  // this led will lit up when the robot turns right

int uS;                  //value of SR04 ultrasonic sensor
int distance;            //distance in cm of ultrasonic sensor
int pos = 90;            //start position of servo = 90
int servoDirection = 0;  // sweeping left or right
int robotDirection = 0;  //0 = forward, 1 = backward, 2 = left, 3 = right
int lastRobotDirection;  //last direction of the robot
int distanceCenter;
int distanceLeft;
int distanceRight;
int servoDelay = 20; //with this parameter you can change the sweep speed of the servo
const int speedLeft = 205; //there seems to be a bit of a difference between these cheap motors :(
const int speedRight = 255; //this motor needs a bit more voltage to keep up with the other

long previousMillis = 0;
const int interval = 650; //interval to switch between the robotDirection, this value will determine
//how long the robot will turn left/right when it detects an obstacle

void setup() {
  pinMode(EN1, OUTPUT);
  pinMode(direction1, OUTPUT);
  pinMode(EN2, OUTPUT);
  pinMode(direction2, OUTPUT);
  analogWrite(EN1, 0);
  analogWrite(EN2, 0);
  pinMode(redLed, OUTPUT);
  pinMode(greenLed, OUTPUT);
  pinMode(yellowLed, OUTPUT);
  pinMode(whiteLed, OUTPUT);
  Serial.begin(9600); //to use the serial monitor
  myservo.attach(8); //servo on pin 8
  myservo.write(pos); //center servo
  delay(1500); // delay so we have some time to put the robot on the floor
}

void loop() {

  sweepServo(); //function to sweep the servo

  getDistance();  //function to get the distance from the ultrasonic sensor

    if (pos >= 15 && pos <= 45)
  {
    distanceRight = distance;  //servo is to the right so measured distance = distanceRight
  }
  if (pos >= 135 && pos <= 165)
  {
    distanceLeft = distance; //servo is to the left so measured distance = distanceLeft
  }
  if (pos > 70 && pos < 110)
  {
    distanceCenter = distance; //servo is centred so measured distance = distanceCenter
  }

  if (distanceCenter >= 25)    // coast is clear, full power forward
  {
    robotDirection = 0;        //move forward
  }
  else   //obstacle detected, turn left or right?
  {
    if (distanceLeft > distanceRight)
    {
      robotDirection = 2; //turn left
    }
    if (distanceLeft < distanceRight)
    {
      robotDirection = 3; //turn right
    }
    if (distanceLeft <= 5 && distanceCenter <= 5 || distanceRight <= 5 && distanceCenter <= 5)
    {
      robotDirection = 1;  // we are stuck, lets try and backup
    }
  }

  unsigned long currentMillis = millis();  //set a timer

  if(robotDirection == 0 && robotDirection == lastRobotDirection)
  {
    forward();
    lastRobotDirection = robotDirection;
  }
  if(robotDirection == 0 && robotDirection != lastRobotDirection && currentMillis - previousMillis > interval )
  {
    forward();
    lastRobotDirection = robotDirection;
    previousMillis = currentMillis;
  }
  if(robotDirection == 1 && robotDirection == lastRobotDirection)
  {
    backward();
    lastRobotDirection = robotDirection;
  }
  if(robotDirection == 1 && robotDirection != lastRobotDirection && currentMillis - previousMillis > interval )
  {
    backward();
    lastRobotDirection = robotDirection;
    previousMillis = currentMillis;
  }
  if(robotDirection == 2 && robotDirection == lastRobotDirection)
  {
    left();
    lastRobotDirection = robotDirection;
  }
  if(robotDirection == 2 && robotDirection != lastRobotDirection && currentMillis - previousMillis > interval )
  {
    left();
    lastRobotDirection = robotDirection;
    previousMillis = currentMillis;
  }
  if(robotDirection == 3 && robotDirection == lastRobotDirection)
  {
    right();
    lastRobotDirection = robotDirection;
  }
  if(robotDirection == 3 && robotDirection != lastRobotDirection && currentMillis - previousMillis > interval )
  {
    right();
    lastRobotDirection = robotDirection;
    previousMillis = currentMillis;
  }
}

void forward()
{
  digitalWrite(direction1, HIGH);
  digitalWrite(direction2, HIGH);
  analogWrite(EN1, speedLeft);
  analogWrite(EN2, speedRight);
  digitalWrite(redLed, HIGH);
  digitalWrite(greenLed, LOW);
  digitalWrite(yellowLed, LOW);
  digitalWrite(whiteLed, LOW);
}

void stop()
{
  digitalWrite(direction1, LOW);
  digitalWrite(direction2, LOW);
  analogWrite(EN1, 0);
  analogWrite(EN2, 0);
  digitalWrite(redLed, LOW);
  digitalWrite(greenLed, LOW);
  digitalWrite(yellowLed, LOW);
  digitalWrite(whiteLed, LOW);
}

void backward()
{
  digitalWrite(direction1, LOW);
  digitalWrite(direction2, LOW);
  analogWrite(EN1, speedLeft+35);
  analogWrite(EN2, speedRight-15);
  digitalWrite(redLed, LOW);
  digitalWrite(greenLed, HIGH);
  digitalWrite(yellowLed, LOW);
  digitalWrite(whiteLed, LOW);
}

void left()
{
  digitalWrite(direction1, LOW);
  digitalWrite(direction2, HIGH);
  analogWrite(EN1, speedLeft+35);
  analogWrite(EN2, speedRight);
  digitalWrite(redLed, LOW);
  digitalWrite(greenLed, LOW);
  digitalWrite(yellowLed, HIGH);
  digitalWrite(whiteLed, LOW);
}

void right()
{
  digitalWrite(direction1, HIGH);
  digitalWrite(direction2, LOW);
  analogWrite(EN1, speedLeft);
  analogWrite(EN2, speedRight-30);
  digitalWrite(redLed, LOW);
  digitalWrite(greenLed, LOW);
  digitalWrite(yellowLed, LOW);
  digitalWrite(whiteLed, HIGH);
}

void getDistance()
{
  runEvery(40)   //loop for ultrasonic measurement
  {
    uS = sonar.ping();
    distance = uS / US_ROUNDTRIP_CM;
    if (uS == NO_ECHO) // if the sensor did not get a ping
    {
      distance = MAX_DISTANCE;      //so the distance must be bigger then the max vaulue of the sensor
    }
    Serial.print("Ping: "); //to check distance on the serial monitor
    Serial.print(distance);
    Serial.println("cm");
  }
}

void sweepServo()
{
  runEvery(servoDelay)  //this loop determines the servo position
  {
    if(pos < 165 && servoDirection == 0)    // 165 = servo to the left
    {
      pos = pos + 5;                        // +1 was to slow
    }
    if(pos > 15 && servoDirection == 1)     // 15 = servo to the right
    {
      pos = pos - 5;
    }
  }
  if (pos == 165 )
  {
    servoDirection = 1;  //changes the direction
  }
  if (pos == 15 )
  {
    servoDirection = 0;  //changes the direction
  }
  myservo.write(pos);  //move that servo!
}
Comments on my code are very welcome, I’m always willing to learn 🙂